Ithaca Dining Installment #4: The Northstar Pub

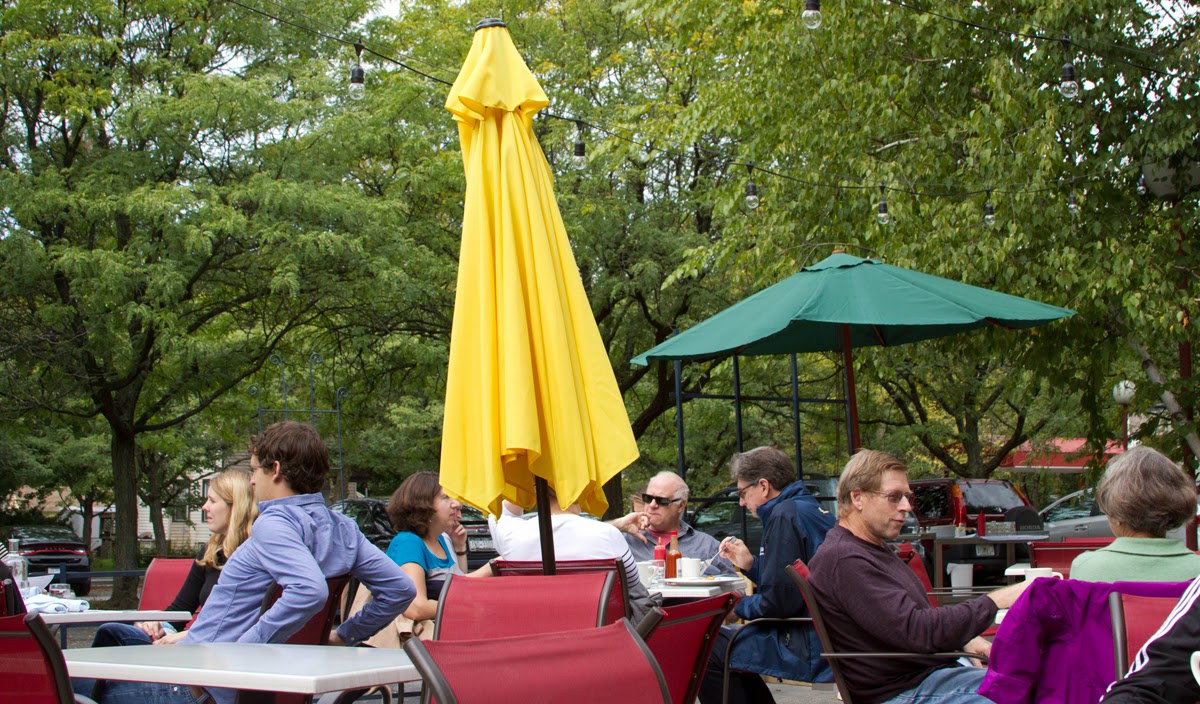
     A lot of Sundays ago, I went to Brunch with Emme at The Northstar in Ithaca, off Tioga Street. It’s deceptively quaint during the day for a pub with a questionable curb appeal.

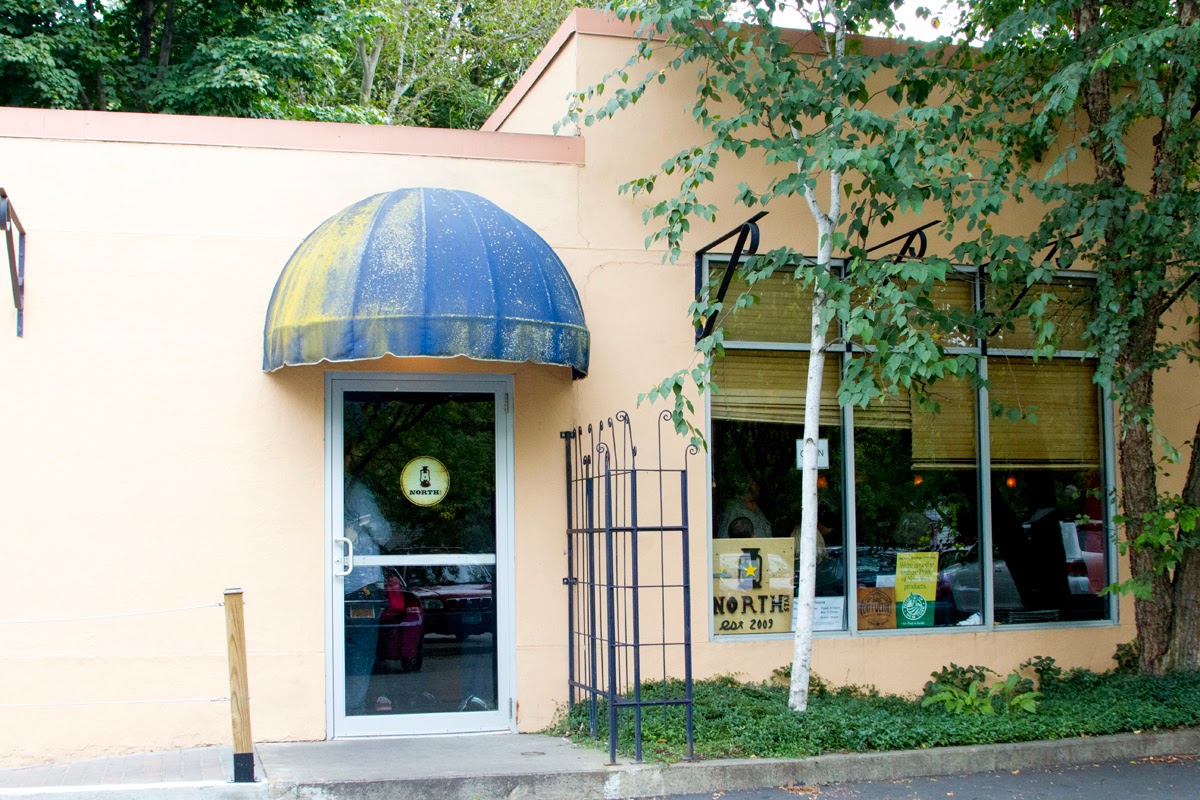
     Their menus are paper because they change so often, though they could keep it in a menu holder of some sort. Anyway.
     Due to my sweet tooth, I had issues once again choosing between a substantial egg breakfast or French toast. You can probably guess what I went for…

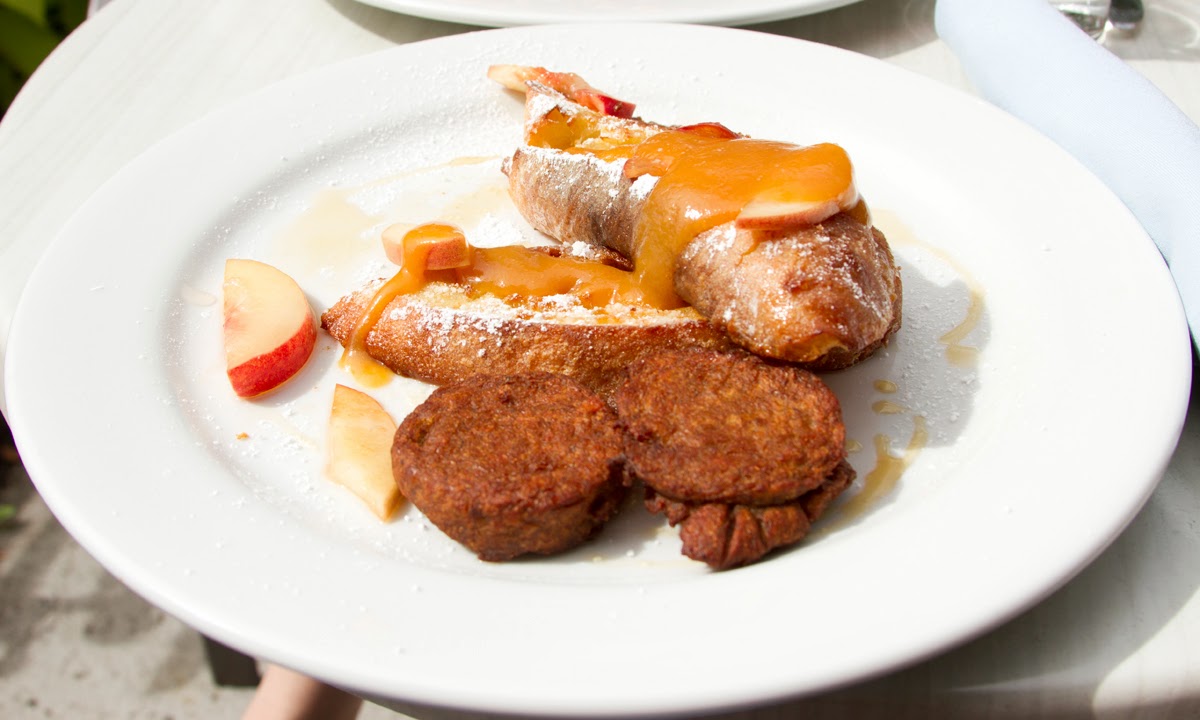
      It was really good, though! French toast soaked overnight, with peaches and what I think was caramel sauce (goes to show what happens when you wait to write a blog post). I probably could have eaten one more piece. I tried really hard to like eat the soy meat patties…I really tried! But to no avail…the combination of starchy texture and taste was pretty unfortunate. Then again, I’m good at eating meat.
     Emme got some form of egg with home fries and sausage…also good!

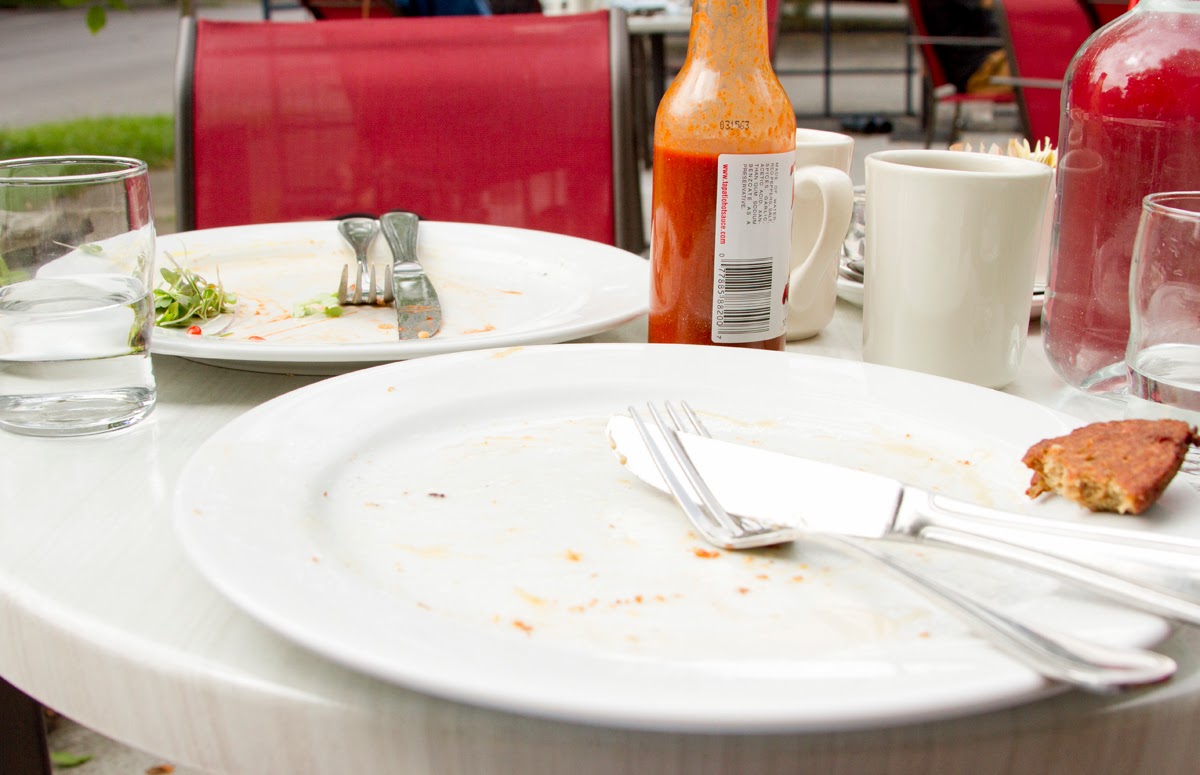
Done & done (ignore the cardboard left)

     There was probably a two-minute wait for our outside table at 11:30 on a Sunday, and the food was not too expensive for an Ithaca brunch place. I might be back, Northstar.

Browned Butter Peanut Butter Rice Crispy Treats

     I either need to think of different ways to acknowledge my lack of regular posting, or find time to post regularly. That first one really isn’t much of an option; I’ve already ran out of things to say, apart from sorry!
     Jake and I are back in action with a Joy-inspired evening of marshmallows and cereal. Luckily, his kitchen is significantly larger than ours. Much like the classic rice crispies, these bars are chewy and crunchy, but with a nice nutty flavor, from both the peanut butter and the browned butter, one would assume. This was my first butter browning experience, and Jake and I had trouble perceiving it with everything else going on. But after a while, I decided that it provided some carameliness. We’ll go with that until I try browning butter in chocolate chip cookies.

Brown butter ≠ burnt butter
Quick add the marshmallows
Quick add the peanut butter
Quick add the rice crispies
Look at that color corrected
Added some chocolate (is “YOLO” over yet?)
Sweet deal.

Browned Butter Peanut Butter Crispy Rice Treats
Ingredients

  • 1/2 cup (1 stick) unsalted butter
  • 1 (10-ounce) bag marshmallows, mini or large
  • 1/2 cup smooth all-natural peanut butter
  • 1/4 teaspoon salt
  • 6 cups (about half a box) crispy rice cereal
  • 1/2 bag chocolate

Butter an 8-inch-square baking pan. Set aside.
In a large, heavy-bottomed saucepan, melt butter over medium heat until just browned. Butter will melt, foam, and froth, then begin to brown along the bottom. Whisk browned bits off of the bottom of the pan.
Just as the butter begins to brown, add the marshmallows, peanut butter, and salt. Stir with a wooden spoon or spatula until mixture is silky smooth and speckled with browned butter bits. Remove pan from heat and add rice cereal. Quickly stir, ensuring that all of the cereal is coated in the marshmallow mixture.
Turn the mixture out into the prepared pan. With buttered or oiled fingertips, press mixture into the sides and bottom of the pan. Let cool and set for at least 30 minutes before slicing into 9 large blocks.
Either get a double boiler setup going or attempt to melt chocolate straight in the pan on a stove. You may need a stick of butter for the second method. Drizzle over dish.
Wrap individually in plastic wrap/tupperware.
Crispy rice treats will last, well wrapped, at room temperature for up to 4 days.

You know a recipe’s legit when The Cooking Channel posts it

The New Adventures of Old Shortbread & the Arrival of Adulthood…


…but mostly upperclassman-dom and off-campus living. Welcome to my new living abode, and more importantly, my new kitchen. It’s quite small; I feel a bit like Smitten Kitchen, minus a few years and a book tour. This little thing is shared among 4 girls. The home of new creations, old family recipes, and college-edition Chopped competitions…we’ll see about that one.
I’ve already made some meat stew for my rice, for the first time all myself. It…tastes great! But I’m gonna have to refine the texture a bit, making fewer chunks and thicker soups. So once I’ve made it to my satisfaction you can expect a post on that, hopefully soon.
But, of course, in the first week of my habitation in an APARTMENT OOOO, I’ve baked cookies. And I…wait for it…created another recipe!…though it’s hard to screw up shortbread. Crunchy, buttery, flaky! What could be better? I know! Add peanut butter, naturally. I got really excited when I tried Wegmans’ organic peanut butter because it was just as peanut buttery as inorganic peanut butter. If you’ve ever tried organic peanut butter expecting the same texture as Skippy’s, you likely experienced a rude shock when you had trouble unclenching your teeth. In short, organic peanut butter is thick as fudge and the point of any of this is that I added peanut butter to your basic shortbread recipe and it was great. The end.
Due to short-notice/impromptu dinner guests, I was stuck to figure out what to make with what was in the kitchen already. This is what went through my head and hands for 20 minutes upon entering the kitchen:

  1. It’s me we’re talking about, if I present a baked good, people will neither be surprised nor complain
  2. No chocolate chips again, no problem. Time for that handy dandy peanut butter!
  3. Ok, sugar and butter in bowl…why do I have a feeling there’s no baking powder…
  4. …there’s no baking powder. Okay, okay…cookies without baking powder?
  5. Shortbread. Done. Wait that’s boring. Peanut butter.
  6. Honey.
  7. Bag of pretzels on fridge…yeah let’s use that.
  8. Should make double this….nah.

They were a massive hit (as if the combo of shortbread and peanut butter weren’t completely revolutionary!). In the meantime, I’ll be needing some baking powder. Look forward to more baking and cooking adventures of Carmen and circle apartment xxxxx. Here are some mean peanut butter pretzel shortbread cookies while we wait.

Peanut Butter Pretzel Shortbread
Makes about 45 cookies

1 cup butter
1 cup sugar
4 tablespoons peanut butter
2 tablespoons honey
2 teaspoons vanilla
2 cups flour
5 large twist pretzels, or 10 mini twist pretzels

Preheat oven to 350 and grease two baking sheets
Cream the butter and sugar. Add the peanut butter, honey, and vanilla. Gradually mix in the flour.
Refrigerate the dough for at least one hour.
Flatten the dough onto baking sheets. Crush pretzels and press into dough. Cut dough into pieces with a knife. Or, roll out onto flat surface and cut out shapes with cookie cutter(s), then press in pretzel pieces.
Bake for 10 minutes, or until top of dough browns.

I had the foresight to write out a recipe that was already doubled;
don’t worry about small masses of dough like this one!
I’m getting excited about the windows in this apartment and their positioning
relative to the sun. #photonerdprobs #cantdealwithartificiallight
This is a cookie dough you I need extra self-discipline to not eat
because there’s no egg


So I may have burnt them a bit…keep an eye on them because I’m not 100%
on the 10 minutes…someone try them and let me know (this was 15).
A nice golden hour comes through our dining room every night.
Very okay with this (may need to work on this lighting for food, however)

Incredibly Whole Wheat Apple Crisp Muffins

I need to think of shorter names for my creations.

 I also need to think of a way to make money off of these creations, because they’re coming, they’re awesome, and they’re trying to compete with my picture taking for time. Culinary school gap year, anyone?
(Joking!) (I think!)
We had a lot of apples the week I was home after returning from Nigeria, and I wanted to do something with them. I combined the Fannie Farmer muffin recipe and Joy the Baker’s apple crispiness (I’m getting all food bloggy as of late…but really just Joythebakery) and voilà! Apple crisp muffins – with only whole wheat flour, because healthy lifestyles are the best lifestyles. Also, I have to make up for the diet that is Nigeria: meat n’ starch. So here! Replace the healthy with white, if you must.

Incredibly Whole Wheat Apple Crisp Muffins
Inconveniently makes 15 muffins…sorry


Apple filling
2 large apples, chopped into large pieces
1 tablespoon sugar
1 dash ground cinnamon

Topping
1/4 cup flour
1/4 cup packed brown sugar
1 dash ground cinnamon
2 tablespoons butter, softened
1 handful crushed walnuts
2 tablespoons rolled oats

Muffin
2 cups whole wheat flour
3 teaspoons baking powder
1/2 teaspoon salt
2 tablespoons sugar
1 egg, slightly beaten
1 cup milk
1/4 cup olive oil

Preheat oven to 375 degrees F and grease 2 muffin pans

Cut the apples and place in a small bowl. Ad the sugar and cinnamon to coat all pieces. Set aside

Mix the dry topping ingredients together in a second small bowl. Add the butter and work into dry ingredients with hands until evenly distributed. Set aside

Place the flour, baking powder, salt, and sugar in a large bowl. Add the egg, milk and oil, only enough to dampen batter, not making it smooth. Incorporate apples to batter.

Spoon batter into muffin pans, filling each cup two-thirds of the way. Top each muffin with brown sugar mixture, then place in oven to bake for 20 minutes.

Hearty
Cookie cameo
The world needs less hunger and more scrapers
I had a fun time juggling the apple pieces with the muffin batter due to their large size but it was quite worth the struggle, as I happily encountered an acceptable ratio of apple-to-muffin. But the size you cut the apples into is ultimately up to you…
I could totally make a living off of this right
Super healthy AND super tasty!

A Chocolate Chip Cookie

     There’s a perfect recipe out there, somewhere, and one day I will find it. I thought I was going to when I finally had the bread flour to get at Alton Brown’s recipe, but once this batch’s honeymoon phase of gooey warmth was over, I didn’t see much difference between this recipe and the recipe we used in my middle school Life Skills class. I’ve produced cookie upon cookie with that recipe, and almost each time they come out differently. These cookies were flat (though this could have had to do with the deceptive oven temp), and not sufficiently chocolate-chip-cookie chewy. And though it instructed me to put six cookies on each sheet, I didn’t listen, because 1. Why should the cookies be coming out that big? and 2. Who has real estate like that? Or time for multiple batches? So the majority of them came out squished against each other, and it took some luck to find two suitable for blog photos….sigh. In conclusion, I’m still on the search for the best chocolate chip cookie recipe. Until then, this one from Joy the Baker from Alton Brown will suffice.

Ingredients
8 ounces unsalted butter
12 ounces bread flour
1 teaspoon kosher salt
1 teaspoon baking soda
2 ounces granulated sugar
8 ounces light brown sugar
1 large egg
1 large egg yolk
1 ounce whole milk
1 1/2 teaspoons vanilla extract
12 ounces semisweet chocolate chips

Directions
Melt the butter in a 2-quart saucepan over low heat. Set aside to cool slightly.
Sift together the flour, salt and baking soda onto a paper plate. Pour the butter into your stand mixer’s work bowl. Add the sugar and brown sugar and beat with the paddle attachment on medium speed for 2 minutes.
Meanwhile, whisk together the whole egg, the egg yolk, milk and vanilla extract in a measuring cup. Reduce the mixer speed and slowly add the egg mixture. Mix until thoroughly combined, about 30 seconds.
This recipe’s “different” because it has you melting the butter.
Much to Joy the Baker’s intrigue.

Using the paper plate as a slide, gradually integrate the dry ingredients, stopping a couple of times to scrape down the sides of the bowl. Once the flour is worked in, drop the speed to “stir” and add the chocolate chips. Chill the dough for 1 hour.

Unfortunately, the look of your dough will not help you gauge
the quality of your end result…unless you did something very wrong.

Preheat the oven to 375 degrees F and place racks in the top third and bottom third of the oven.

Scoop the dough into 1 1/2-ounce portions onto parchment-lined half sheet pans, 6 cookies per sheet. Bake 2 sheets at a time for 15 minutes, rotating the pans halfway through. Remove from the oven, slide the parchment with the cookies onto a cooling rack and wait at least 5 minutes before devouring.

If it looks like I forgot to take a picture of my dough balls before
putting them in the oven, it’s because I did.
I insist on the addition of walnuts…that is all.

Oatmeal Date Peanut Butter Surprise Cookies

As seen on “Foreign Food on Photos“, my Nigerian food blog
If you look closely you can see the SURPRISE

     EVERYONE GUESS WHAT! I made cookies.
     Duh, I made cookies…I mean I created cookies. How is this the first time I’ve made a cookie recipe, you ask? I’ll get back to you on that. But it looks like it took traveling 5000 miles from my kitchen to do it. Don’t worry, it will happen again! And it’ll only take me 300 miles. But here’s what happened.
     My uncle bought a good 3 kilos of rolled oats after giving up on the instant lifestyle (darn). He kindly asked if I would be willing to help him make some cookies with them (or something like that). So what does bored old me do with a clean kitchen in the dead of night when everyone’s gone to bed? Get cReAtIve. And too creative, by the sounds of it, right? Don’t worry, read on!
     With a half full tub of peanut butter waiting for me to make my lunch sandwiches, some questionably-sourced dates returning from I’m-not-sure-where in my cousin’s hand, no chocolate, and those darned oats, I had some interesting flavors to work with. And work I did. I wanted to go all out after the chocolate chipless cookies I’d made some weeks before, so why not use all these things, and if no one likes them, more for me! Haha kidding…
     ….yeah. So I had the basics: butter, sugar, flour etc. I decided to try the dark brown sugar that was around, which was a successful first. It’s also expiring on Thursday. Here was my “logic”, if I had been thinking rationally (I think it’s all subconscious at this point): peanut butter cookies are a norm, and so are oat and date cookies (soo good, you can actually check “my” recipe here!). Oats and peanut butter could be easily paired together. This combo might need something sweet to cut the thickness/nutty flavors. Dates are sweet. In they go!

Dark brown sugar for extra molasses chewiness and color

     Of course, right after adding some knife fulls of peanut butter, I decided I wanted to be like those fancy gourmet bakers who stuff shenanigans into their cookies. In my ideal cookie, this would be chocolate. Just an eruption of melted chocolate everywhere. But I had peanut butter. And peanut butter is what I used. So peanut butter cookies became stuffed with peanut butter. And it was an excellent choice. If you’re not so into PB, you can skip that part, but don’t skip the PB in the dough because it’s mild and lovely. I made some normal cookies so I wouldn’t overwhelm with the decadence, and they were good too.
     Alright, enough of the blog banter, let’s get y’all baking these. And I must warn you that some of these instructions and measurements are approximate, for I guesstimated a temperature from the knob on the gas oven and kept adding more of stuff. Who goes exactly by the recipe, though? They’re more like guidelines, anyway.
     Also, if you think of a better name for these cookies, do tell! I’ll bake you some for free. So far my other candidate is “Oatmeal Date Cookies with a Heart of Peanut Butter (or gold??)”

How innocent-looking

Crazy Oatmeal Date Peanut Butter Surprise Cookies
Makes 25 stuffed cookies, or 35 regular cookies

Ingredients
1/2 cup sugar
1/2 cup dark brown sugar
1 cup butter at room temperature
1 egg
1 teaspoon vanilla
1/4 cup peanut butter
2 1/2 cups flour
1 1/2 teaspoons baking powder
2 dashes of salt
6-8 mejdool dates, coarsely chopped
1 cup rolled oats
Several more spoonfuls of peanut butter

  1. Preheat the oven whenever you want, but it will be at/around 360 degrees. Butter two cookie sheets and set aside.
  2. Combine your softened butter and sugars in a large bowl until smooth. Add the egg and vanilla and mix well, then add the peanut butter.
  3. Gradually mix in the flour, baking powder and salt. Add in the dates, making sure they separate in the dough. Gradually stir in the oatmeal.
  4. To make stuffed cookies, make small balls of dough, using just over half the dough, and place on the cookie sheets. Use a spoon to make a small well in the dough. Place in the refrigerator for 30 minutes to stiffen. Place a 1/4 teaspoon of peanut butter in the well of the dough. Use your hands to flatten small tops to cover the peanut butter. Diligently seal the sides of the cookie so the peanut butter doesn’t escape.
  5. Bake for 10-12 minutes, or until a toothpick comes out clean/with just peanut butter.

You can make bigger cookies to add more peanut butter,
but they’re already fairly large
I suggest finding your milky beverage of choice before
finishing the batch

Sauté? What’s That? Father’s Day Dinner

K super fast rundown of the dinner I made for Father’s Day, proving I am in fact capable of cooking a meal on my own, readyGO
“Chickpea Flour Meatballs”…sweet (literally)

mmm

Onions + salt/pepper + turmeric

Broth

Yay!
Next time I’ll use brothy things and make more of a stew than a soup.
In other waay more exciting news, I am traveling the world within the next 24 hours. Meaning for you that I will be leaving this blog for the next eight weeks to make a new food blog whooooa. Where am I going might you ask? Nigeria~~While photo-ing, fasting, and feasting, I will be showing the world the beauty that is Nigerian cuisine. So go take a look at Foreign Food on Photos within the next 10-15 days if you miss me. Until then, happy fooding!

Facebook Responds: Pumpkin Oatmeal Cookies

Ok who has the same plates as we do?

     I was running low on flour, yet I had the baking itch. Some timing that was. Too indolent (yay vocab words) to figure out what to make while my dad stopped at the too-far-and-too-lazy-to-go co-op just for me, I used all the resources at my fingertips at the time (all nine). When faced with the request “Aaaah quick someone tell me what to bake.” in the form of a Facebook status, Facebook really delivered. I went with former classmate Mandy’s Pumpkin Oatmeal Cookies, from Post Punk Kitchen, on their game once again (recall the college-ified chocolate chippers)! Excellent choice. There was definitely more chatter than I was expecting on that status. About eight people’s worth. I think I could make this work to my advantage. Might make it a new theme: mandatory recipe usage from comment of Facebook status…uh oh.

Get your nutmeg ready! Because yours is probably whole too
(it’s the hipster thrifty thing to do)

Molasses is important!

     Since this was a vegan recipe, there’s no egg or butter. But you can change this if you want, though the texture without is just fine. Key players are now canned pumkpin, molasses, cinnamon and nutmeg.

Still playing with my food…

     I omitted a lot of extra crunchies that the recipe had, but I’m sure the cookies are still fairly nutritious…

You should probably keep the oatmeal (rolled/old-fashioned!)

Ok here’s my version
Pumpkin Oatmeal Cookies

Ingredients
2 cups flour
1 1/3 cups rolled oats
1 teaspoon baking soda
3/4 teaspoon salt
1 tsp cinnamon
1/2 teaspoon nutmeg
1 2/3 cups sugar
2/3 cup half melted butter (it’s not like you don’t do that by accident anyway right?)
2 tablespoons molasses
1 cup canned pumpkin, or cooked pureed pumpkin (ain’t noobody got time fuhdat)
1 teaspoon vanilla

Directions
Preheat oven to 350. Have ready 3 greased baking sheets.
Mix together flour, oats, baking soda, salt and spices.
In a seperate bowl, mix together sugar, butter, molasses, pumpkin and vanilla until very well combined. Add dry ingredients to wet in 4 batches, folding to combine.
Drop by tablespoons onto greased cookie sheets. They don’t spread very much so they can be placed only an inch apart. Flatten the tops of the cookies to press into cookie shape. Bake for 16 minutes at 350
Remove from oven and get cookies onto a wire rack to cool. These taste best when they’ve had some time to cool and set. They taste even better the next day! ( <– Ha what?)

Here’s the real one…

Let’s do this again, social media outlets.

Speaking of, my Instagram feed’s been killin it as of late, check it out for pre-blogging snaps @ http://instagram.com/carmzl …#shamelessplugging.
While we’re at it, send me your favorite cookie recipe! Maybe it’ll show up here. Till next time!

Chocolate Chip. Cookie Dough. CUPCAKES.

     What happens when you bring a cookie chef and a cupcake pro together? Something like this. Two months in the planning, Jake and I finally made our chocolate chip cookie dough cupcakes yesterday. Far from healthy, the combination of cookie dough balls (egg-less, y’all), chocolate cake batter and cookie dough frosting (ohh yeah) is something I wish we’d thought up first. But apparently this already existed, with different versions and varying degrees of doughy-ness and cupcake presence. Clearly, the correct combination includes cookie dough, in the center of a chocolate cupcake, topped with cookie dough frosting. Take it from the real pros, and the may-as-well-be-pros when we say you must experience this.

If you want the dough to stay dough in the cupcake,
leave them in the freezer while you run to the store to get
baking soda…and make the cupcake batter.
If you think they might be too big when you round them, they are.

    So first you make the cookie dough, which is egg free, so fret not about your salmonella poisoning odds. Though you probably weren’t…sigh. Then you stick the bowl in the fridge, take it out after 15 minutes and roll the dough into little balls. While you’re waiting you can make the cupcake batter. The whole half cup (or 1 if you’re doubling) is not necessary, as we discovered.

We do not condone eating this raw, as it does have egg in it.

But sometimes you just have to test it, right?

     The best part was probably dropping the cookie dough into the batter-filled cupcake liners. If you’re only skimming the recipe you may not notice what Jake saw about keeping the dough afloat – if the dough sticks out of the batter and it’s touching the bottom of the liner, cover the dough anyway, even if it sticks out a bit. We tried rolling/turning/flipping the dough balls with toothpicks. This way, they won’t cook as much.

Leave some space for the dough balls when you’re filling the liners;
a full 1/4 cup worked well.
Like so, previous to awkward rolling

      While these are baking, you can make the frosting – don’t skip it if you want the full experience! Use of an electric mixer/stand mixer is necessary so you can whip the butter properly for a true frosting texture.

We don’t exactly not condone eating this one out of the bowl…
SO GOOD P:

     The hardest part of it all may be waiting for the cupcakes to cool before you put the frosting on. But you know what happens if you don’t – melted mess everywhere.

Technically they’re fine without the frosting…

     And you’re done! Depending on what you were expecting, you may be surprised once one hits your mouth. I think it takes some practice/diligence to perceive the distinct flavor of each part, but maybe that’s not the point.

     I’m glad we stuck to the raw dough, and that it mostly worked, apart from the occasional cooked crust at the bottom. Play around with different versions and recipes; they’re definitely out there for consumption. Happy baking!

You should probably hire us for your next party.
Quick note: we doubled the filling & cupcake recipe, and not the frosting: ended up with three or four cupcakes that weren’t frosted. Also, we added the chocolate chips into the frosting as you can see…thought it looked more like cookie dough.
Chocolate Chip Cookie Dough Cupcakes

Yield: 1 dozen cupcakes
Prep Time: 45 min + freeze time
Cook Time: 25 min

Ingredients:
COOKIE DOUGH FILLING:
3/4 cup all-purpose flour
1/8 teaspoon baking soda (not necessary, so we found)
1/8 teaspoon salt
4 tablespoons (1/2 stick) unsalted butter, melted
1/4 cup packed brown sugar
2 tablespoons granulated white sugar
2 tablespoons milk
1 teaspoon vanilla extract
1/2 cup miniature chocolate chips
CUPCAKES:
1 cup all-purpose flour
1/2 cup unsweetened cocoa powder
1 cup granulated white sugar
1/2 teaspoon baking soda (a little more necessary)
1/4 teaspoon salt
3/4 cup hot water
1/2 cup vegetable or canola oil
1 large egg
1 1/2 teaspoons vanilla extract
COOKIE DOUGH FROSTING:
3/4 cup (1 1/2 sticks) salted butter
1 3/4 cups powdered sugar
1/3 cup packed brown sugar (<–makes all the difference in the cookie taste!)
1/2 cup all-purpose flour
1 1/2 tablespoons milk
1 teaspoon vanilla extract
GARNISH:
additional mini chocolate chips
12 mini Chips Ahoy cookies (lol nahh)

Directions:

1. Prepare the cookie dough filling (see *Tips below): In a small bowl, whisk together the flour, baking soda and salt. In a medium bowl, use an electric mixer to stir together the butter, sugars, milk and vanilla. Stir in the dry ingredients and the chocolate chips. Refrigerate for 15 to 30 minutes, or until the cookie dough is firm. Scoop out dough in 2 tablespoon scoops and place it on a cookie sheet. Freeze until firm, at least 30 minutes.
2. Prepare the cupcakes: Preheat the oven to 375 degrees F. Line a cupcake pan with 12 liners. Place the flour, cocoa, sugar, baking soda and salt in a blender. Blend to combine. Add the water, oil, egg and vanilla. Blend to combine, scraping down the sides as needed a couple of times until all is well mixed. Divide the batter between the 12 cupcake liners. Drop a ball of frozen chocolate chip cookie dough into the center of each cupcake. If you would like the cookie dough to bake up slightly, keep the top visible as pictured in the post. If you’d like to keep the cookie dough somewhat raw, push it to the bottom of the cupcake wrapper, making sure that the batter comes up and over the dough.
3. Bake the cupcakes for 20 to 25 minutes, or until a toothpick inserted into the cupcake portion of the cupcake (not tested through the center where the dough is), comes out fairly clean. Cool the cupcakes completely before adding the frosting.
4. Prepare the frosting: In a medium bowl, use an electric mixer to combine the butter and sugars until smooth and creamy. Mix in the flour, milk and vanilla and continue to mix until all is well combined.
5. Assemble: Frost cupcakes with a knife or scoop the frosting into a piping bag and pipe it on decoratively. Sprinkle mini chips on top and garnish with a small chocolate chip cookie.

TIPS:*You don’t necessarily have to melt the butter and refrigerate the dough before scooping. The melted butter just helps the sugar dissolve a bit more so you don’t have that grainy texture in the cookie dough. It is necessary to freeze it though.
Recipe from Recipe Girl 

Check out a first ever homemade cupcake attempt hither!

Home Sweet Cheese

Plain and simple: How to make legitimate grilled cheese in under 30 minutes, from my family’s kitchen to yours.
Go find:
A large loaf of Ciabatta bread
Olive oil
A large tomato
Salt
Twoishmaybe cups of any cheese of your preference (Jarlsberg though…), shredded
Any additions of your choice, i.e. olives, capers, green onions (lol), chicken
STEP ONE: Cut the bread however you want, but you should probably cut large pieces in the width you’d like, then cut that in half, so that the crust is at the bottom.
STEP TWO: Drizzle olive oil on the bread.

STEP THREE: Cut the tomato into thin slices and place on bread. Salt. After the tomatoes you can add your own stuff, so they’re in between the tomato and the cheese. Then add as much cheese as you want. It may look like you really piled it on, but I’ll just say that once it’s melted, it’s not as cheesy as it looked before.

STEP FOUR: Put the bread on a baking sheet and place on the top shelf of the oven, on broil (which does in fact mean only the top burner’s on). Keep the oven door ajar, and watch for the cheese to melt and brown in spots – don’t go too far, this won’t take more than 10 minutes.
STEP FIVE: Let cool, eat, repeat.
Original recipe can be found…oh wait! Right here.
So that’s how much cheese was put on to get what’s melted in the top photo