
Here it is; I promised the next installation of The Best Chocolate Chip Cookie, according to, well, me. Part of the problem here is that cookie eaters have different preferences in a cookie, so it’s hard to say there’s one “best” cookie. But I am close to the best one, for the typical food appreciator’s palate. There are so many things that can be done differently in a CC cookie, so I plan to slowly break down the options and results. The first thing I wrote about was the chocolate in a cookie. I should also be referring to these cookies as chocolate chunk cookies. I have since read somewhere that chunks are better anyway, especially since a lot of chocolate chips have things other than chocolate/milk/sugar. BOO! So take it from the professionals: chunks > chips. A lot of other chocolate-related things were discussed in the first part of this post, check it out here. Otherwise, prepare for some technique talk.
Today is about butter. If you’ve ever browned butter before, you’re familiar with the aroma and taste that comes with it: caramely, butterscotchy, awesome. It can be tricky at first to not burn it, but once you get the hang of it, it doesn’t take too long, and it’s worth the elevated flavor that comes with it.
Today is also about time. Time is of the essence as much as that vanilla extract is.
A friend in San Francisco showed me a chocolate chip cookie recipe from a well-known baker in the city, Josey Baker (yeah, his last name is Baker). He’s famous for his breads and $4 toasts in the hip SF cafés, but his chocolate chip cookie recipe also knows what’s up. His calls for all the butter to be browned. This gives the whole cookie a new web of flavor. At first, it hits you in the face. But once you’re used to it, you only notice when the brown butter is missing. This is how cookies should be: brown-buttery to perfection.

If your butter looks like this on the stove, you’re close, but not quite to browning. Make sure you keep stirring. Melt the butter on medium heat, and this bright yellow color will come after much foaming has subsided. Not long after, the color will begin to change and the little bits of milk solids that have appeared will go from white to brown. As soon as this happens, move the butter to a new vessel so it stops cooking. There you go, brown butter. I’ve read some recipes that say to discard the milk solids – don’t do it!! That’s where all the caramely goodness is. It won’t poison you!

When I say time, I’m talking about baking time. Josey Baker said something pretty interesting:
“You should probably take the cookies out before you think they’re done.”
He was on to something. Read on.
“You’ll know they’re done when they’re a beautiful light brown; the middles will still look a little gooey, but the outsides will push back ever so slightly when you poke them with your finger.”
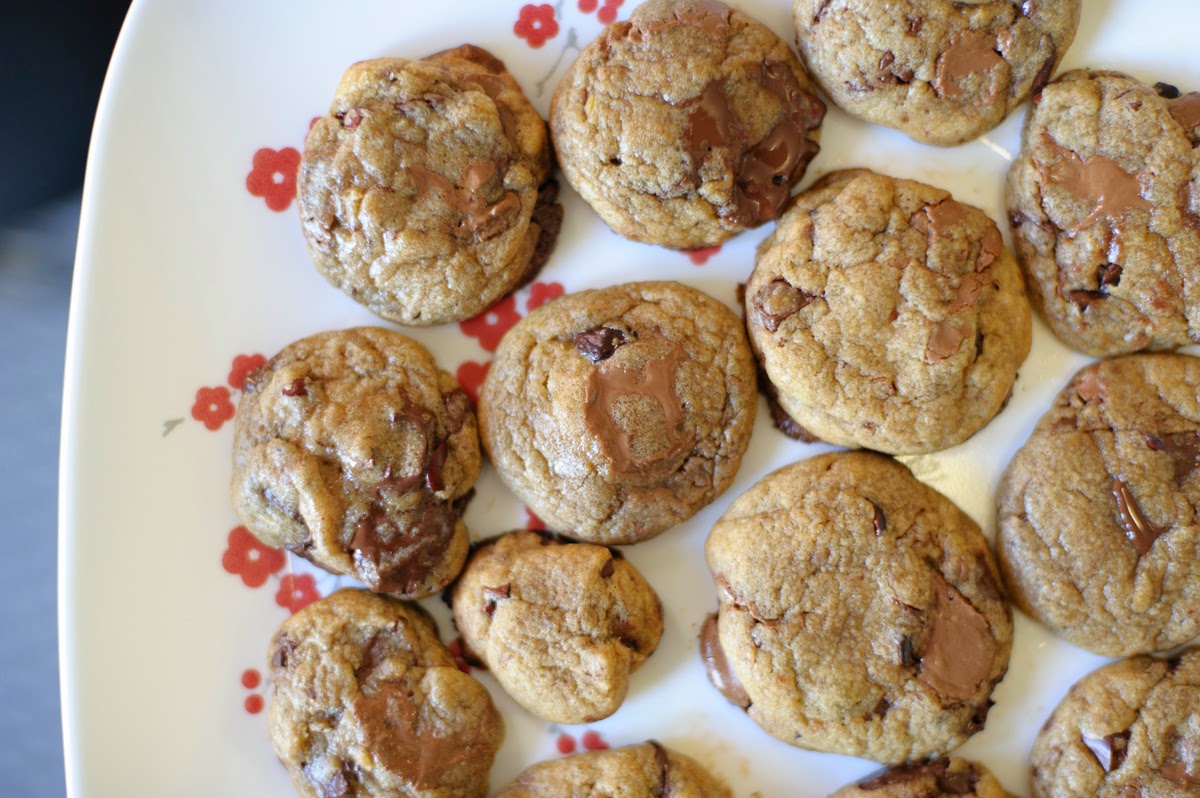
Now, I’ve found that this is kinda dependent on when you plan on eating the cookies. If you’re curing a cookie fix and are planning to finish half the batch right away, you can probably keep the cookies in the oven a little longer. When you use Josey’s technique, the cookies take a long time to properly set; i.e be able to pick up without the whole cookie falling apart onto the counter. On the other hand, if you have time, the “undercooking” is great for assuring chewy cookies in days to come. I put “undercooking” in quotes because the cookies aren’t really undercooked. Once you take them out of the oven to cool, they’re still cooking slightly from the hot baking sheets, anyway. Moral of the paragraph: take the cookies out about 2 minutes before you normally would. If you’re squirming in your apron, go ahead and put them back in for a minute.
Okay enough science, here’s an updated chocolate chunk cookie recipe for you! I’ve been making small batches recently so that 1. We don’t eat as many in the same amount of time, and 2. I have more opportunities to play around with different versions. So feel free to double this recipe.
Chocolate Chunk Cookies
Makes about 25 cookies
1/2 cup (1 stick) unsalted butter, browned
1/4 cup white/cane sugar
1/4 cup brown sugar
1/2 teaspoon vanilla extract
~combine these ingredients after the butter has cooled slightly.
1 egg
~mix into above ingredients
1 cup flour
1/2 teaspoon baking soda
1/2 teaspoon salt
~gradually sift these into the wet mixture, mixing until smooth
1 cup semi-sweet chocolate chunks
1/2 cup milk chocolate
2 tablespoons cocoa nibs (optional)
~incorporate into dough
Chill for at least two hours in the fridge. Then place teaspoonfulls on baking sheets and place in an oven at 375 degrees for 6-7 minutes, or longer for larger cookies. When the edges have rounded out but the centers still look shiny, take the cookies out and breathe. Wait for some time for the cookies to set. This won’t be when the cookies have cooled, but after. Feel free to transfer to a different flat surface. Enjoy!

[…] been some time since I last gave you a chocolate chip recipe of mine, even though I always refer to my constant struggle to find the […]
LikeLike