Wing it: Chocolate Speculoos Popcorn

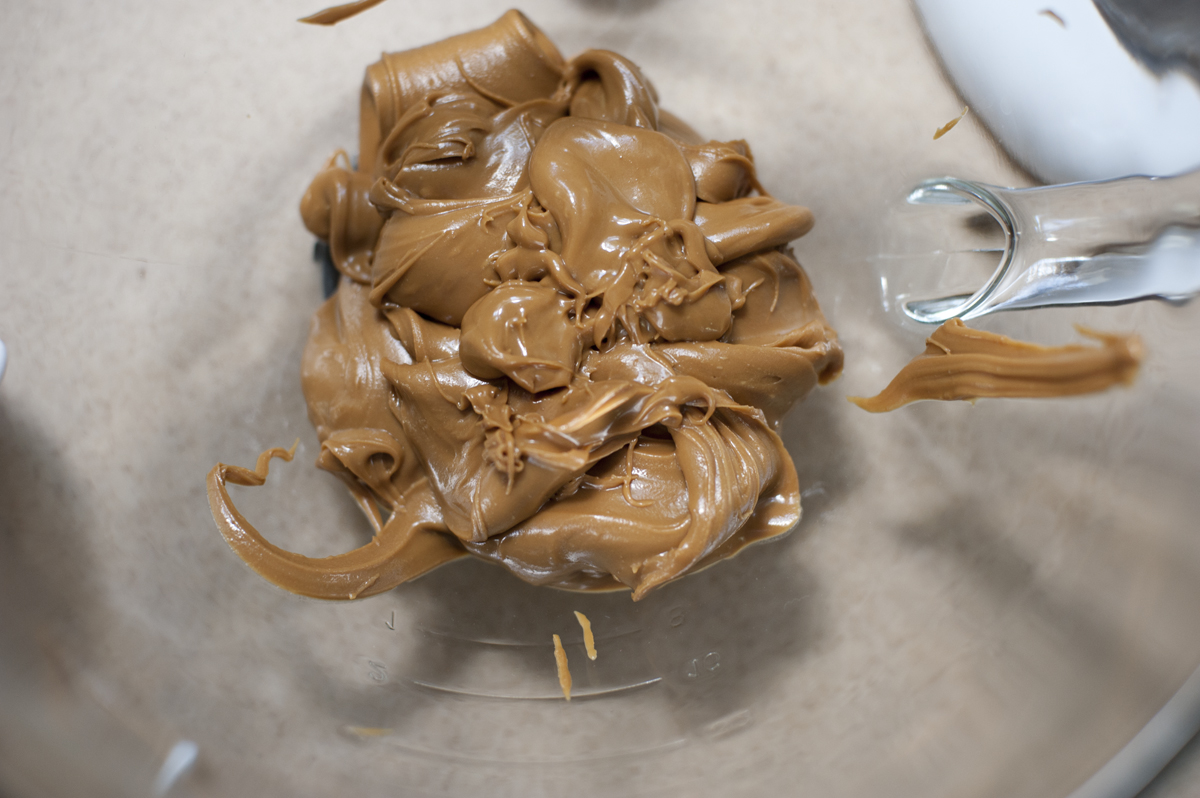
I’ve been playing around a lot with Speculoos spread recently and thought I’d throw it in some popcorn and see what happened. Naturally, great things happened. If you’re unfamiliar with Speculoos, it’s a tea biscuit from Belgium that I think of as a cross between a graham cracker and a gingersnap. You can find them at Wegmans, Fairway, and many other large supermarkets. The spread is what you get when you crush up the biscuits and add some other emulsifying stuff. It’s also known as cookie butter, easily found at Trader Joe’s, and is better than Nutella. It has a somewhat spicy flavor and fun texture that is fun to bake with.

rubber-scraper-mvt_chocolate-speculoos-popcorn_carmen-ladipo-january-2017_0002

I hoped that melting the spread with chocolate chips would make for a good popcorn topping, and I was right. I didn’t bother measuring anything; the amounts are mostly based on personal preference anyway. Here’s what you need to do:

rubber-scraper-mvt_chocolate-speculoos-popcorn_carmen-ladipo-january-2017_0001

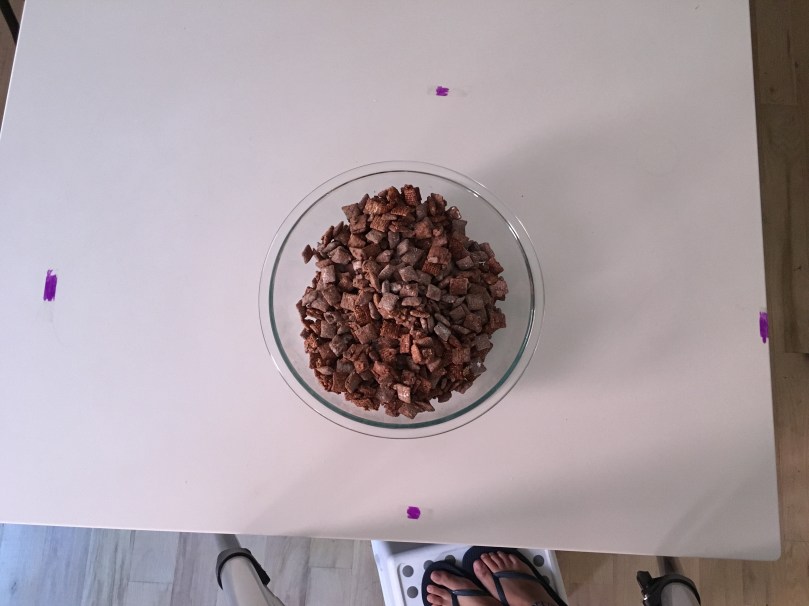
Step 1: Make some popcorn from scratch. You can buy popcorn kernels at the grocery store, and either pop them on the stove (instructions here), or in a large microwaveable bowl. Cover the bottom of the bowl with one layer of kernels, and cover with a plate that fits over the bowl. Microwave the popcorn until there are 3 seconds between the pops. Sprinkle salt to taste.


rubber-scraper-mvt_chocolate-speculoos-popcorn_carmen-ladipo-january-2017_0013

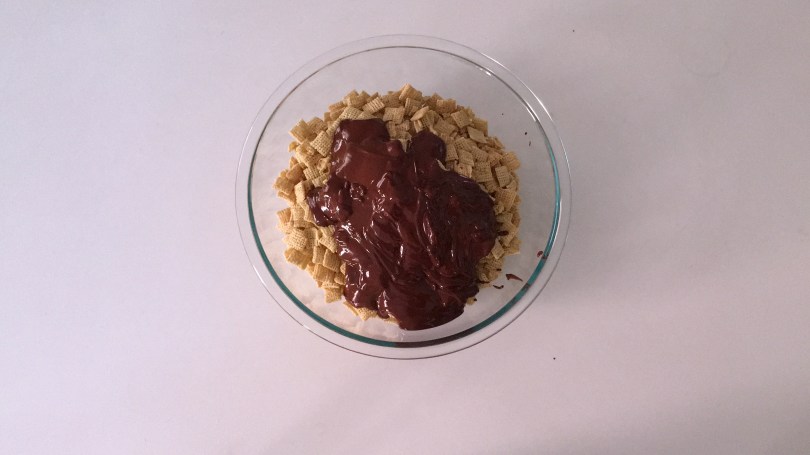
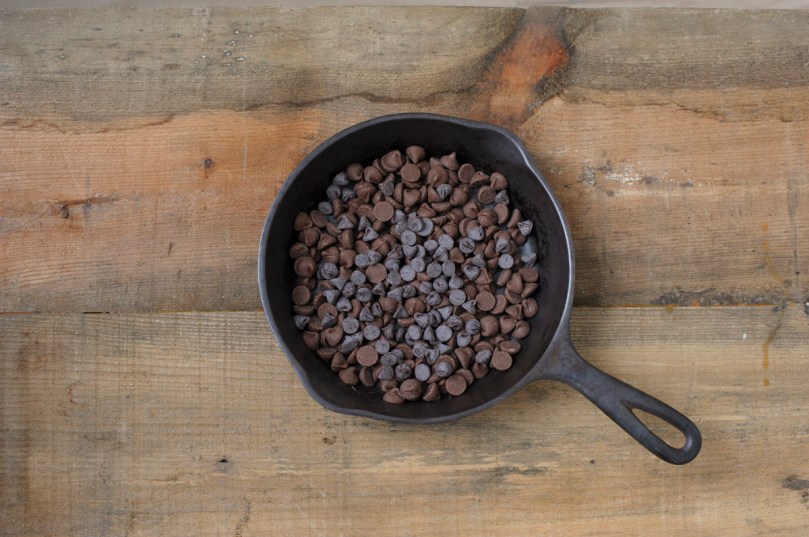
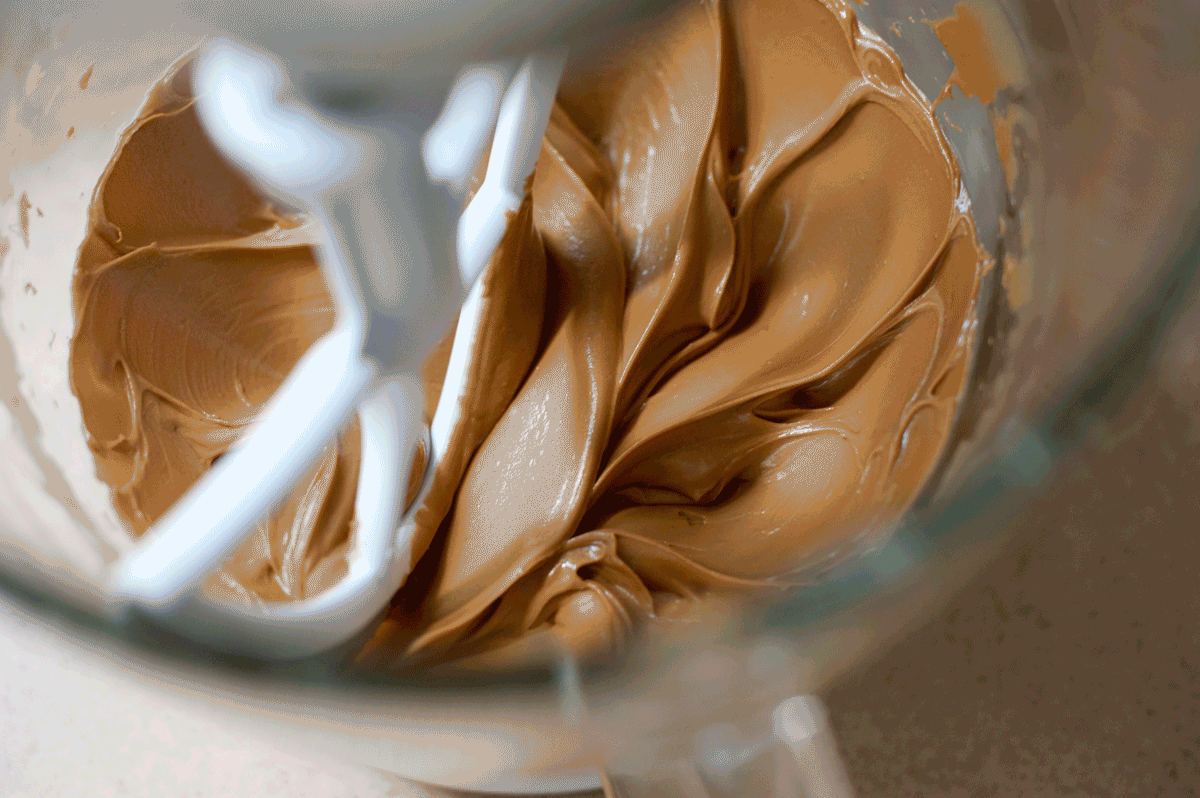
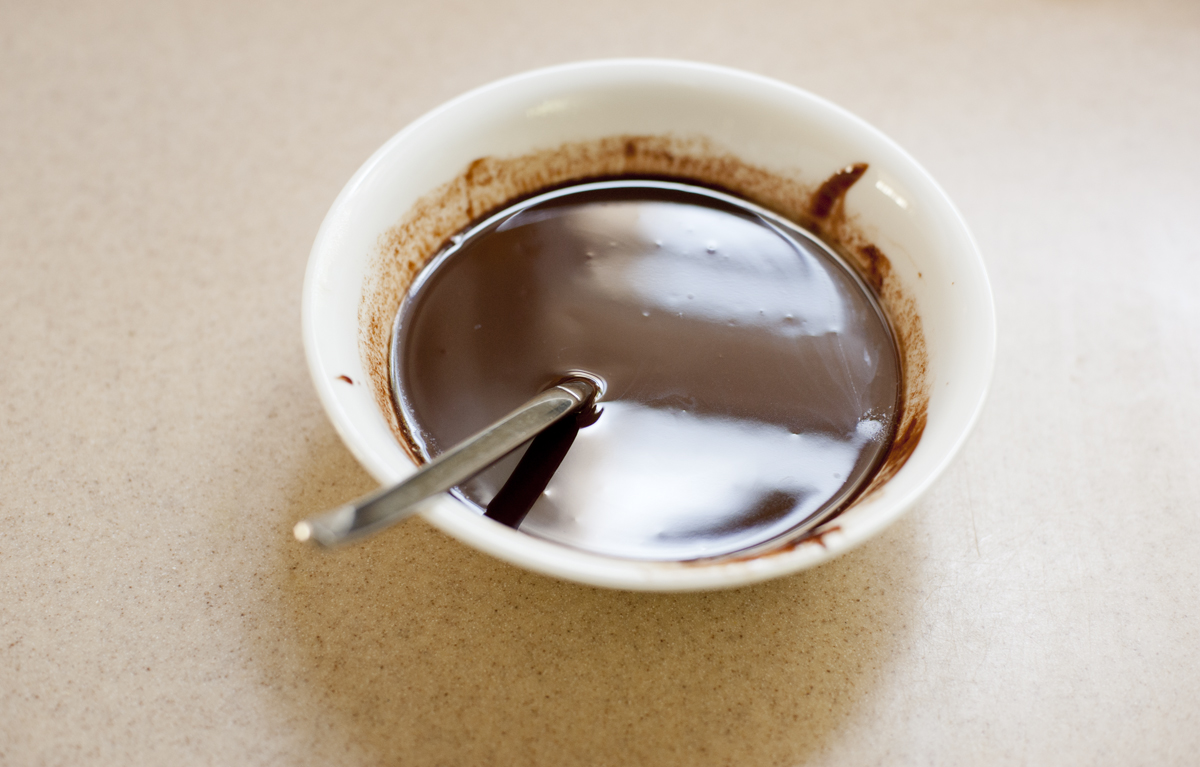
Step 2: Microwave some chocolate chips and Speculoos spread on high in 15 second intervals. If you’re not sure you’ve microwaved enough, it’s easy to add more later.


rubber-scraper-mvt_chocolate-speculoos-popcorn_carmen-ladipo-january-2017_0015

Step 3: Pour the meltedness on the popcorn and coat evenly with a spoon, rubber scraper, or both.

rubber-scraper-mvt_chocolate-speculoos-popcorn_carmen-ladipo-january-2017_0022

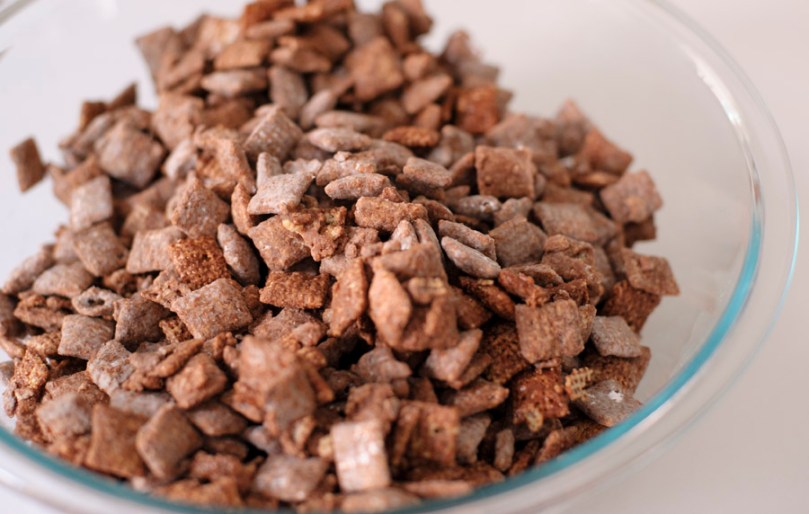
Step 4: Spread the popcorn onto a baking sheet covered with parchment paper and stick in the fridge for at least 20 minutes so the chocolate can solidify.


rubber-scraper-mvt_chocolate-speculoos-popcorn_carmen-ladipo-january-2017_0027

Step 5: Take out and enjoy! Great as is for a party dessert, or on top of ice cream!

Top 5 of 2016

Poor 2016…it’s going in the history books with a hashtag next to it. Lost your job this year? #2016. Lost a beloved celebrity role model? #2016. Despite the slew of unfortunate events in the last 365 days, it’s still important to look back to remember the progress we made and good things that happened. Here are 5 of your and my favorite posts from 2016, and here’s to a new year that we’ll be proud of 365 days from now.

chocolategif
1. Mast Brothers: Genius or Nah?
What’s all the hype about? Is their chocolate chip cookie recipe really all that?

Processed with VSCOcam with c1 preset
2. Don’t Get Pancakes at a Place Called “egg”
Lessons learned: 1. It’s best to order something that a restaurant is named after, and 2. Not all brunch is created equal.

skilletsmoresgif
3. Skillet S’mores
The most impressive party dessert to whip out in your times of need.

DSC_3693
4. The 3 Why’s of Chocolate Chip Cookies
So many questions…here are 3 answers.

mlkgssmktPan2
5. The Art of Dining Solo
The ultimate treat-yourself with its own perks.

Don’t see your favorite? Leave it in the comments below!
Happy New Year!

How To: Muddy Buddies! (Video)

DSC_8064

Also known as puppy chow, this was a college party (read: potluck) favorite back in the day. It takes six ingredients, and it’s a lot of fun to make. I made a video to prove it:

Here’s your recipe

Ingredients
9 cups of Chex cereal, in any variety you prefer
1 cup chocolate chips
1/4 cup (1/2 stick) salted butter
1/2 cup peanut butter
1 teaspoon vanilla extract
1 1/2 cups powdered sugar

Directions
Put the cereal in a very large bowl and set aside. Microwave the chocolate, peanut butter, and butter in a bowl until melted and smooth, about 40 seconds. Add the vanilla extract and stir. Pour this over the cereal and combine gently until the cereal is coated evenly. Place the cereal in a gallon sized ziploc bag and add the powdered sugar. Shake well until all the powdered sugar has stuck to the cereal. Lay out to dry for 10 minutes if you can wait,  then serve!


It’s great with milk, actually….

IMG_1074
“behind/above the scenes”


These Days’ Chocolate Chip Cookie Recipe

cookiestackgif

It’s been some time since I last gave you a chocolate chip recipe of mine, even though I always refer to my constant struggle to find the best recipe. While it is a constant struggle, I’ve been on a break to work on a fun and exciting Nutella cookie…more on this to come. In the meantime, I will leave you with my latest chocolate chip cookie recipe. And I’m not going to belabor the definition of the best chocolate chip cookie, because it’s different for everyone. There’s a quote from market researcher and spaghetti sauce selling extraordinaire Howard Moskowitz pointing out this phenomenon, when describing an experiment with one of his first clients: “There was no such thing as the perfect Diet Pepsi. They should have been looking for the perfect Diet Pepsis” (from Malcolm Gladwell’s essay “The Ketchup Conundrum”).

The point is not that I read a Malcolm Gladwell essay (you should too, though) but that I can’t tell you what the best chocolate chip cookie recipe is. If you happen to enjoy yours chewy on the inside,  butterscotchy, and full of chocolate like I do, this will get you in the right direction.

Happy baking!

studio-test_carmen-ladipo_0108

Chewy Chocolatey Chocolate Chip Cookies
Yields around 35 cookies

1 cup unsalted butter
1/2 cup brown sugar
1/2 cup sugar
2 eggs
1 teaspoon vanilla extract
2 1/4 cups all-purpose flour
1 teaspoon baking soda
1 teaspoon salt
2-3 cups chocolate chips/chunks

Brown the butter on the stove, constantly stirring. Transfer to a heat resistant bowl and let cool. When the butter is cool, combine with sugars and vanilla. Mix in the eggs. Gradually fold in the flour, baking soda, and salt until just combined. Add the chocolate morsels. If you have time, chill in the fridge for 4 hours to overnight.

Bake in the oven at 375° for 8-10 minutes or until the edges are browning and the center is almost-but-not-quite-done. Let cool on the cookie tray.


Skillet S’mores

I’ve seen this idea floating around the internet, probably on Tasty or Buzzfeed, and I had the perfect size (read: smallest) cast iron skillet to try it in, so here’s a great way to prepare for the summer in the safety and warmth of your kitchen while waiting for the March Nor’easter to pass.

skilletsmoresgif

This is a good and fast thing to whip up if you have people over and are trying to keep them happy – but for that, you’ll probably want a bigger skillet…

rubber-scraper-mvt_carmen-ladipo_cast-iron-smores_0003

Just load up the components of a s’more, minus the graham cracker, into a cast iron skillet. So, that’s really just the chocolate and marshmallows. Use milk or semi-sweet chocolate chips (or both, hi), depending on your taste. Add the marshmallows on top until you can’t fit any more. Pro-tip, which I did not do: cut the marshmallows in half so it’s easier to get to the chocolate once everything is melted. It will also allow the marshmallows to melt more, before the chocolate seizes.

rubber-scraper-mvt_carmen-ladipo_cast-iron-smores_0006_1
Needs more padding
rubber-scraper-mvt_carmen-ladipo_cast-iron-smores_0007_1
Perfect


Throw it in the top half of the oven and broil for a few minutes – go nowhere! Keep a close eye on the marshmallows and take out the skillet once the marshmallows have browned to your liking.

rubber-scraper-mvt_carmen-ladipo_cast-iron-smores_0009

Now! Grab your graham crackers and dig in. But really, you’ll need some wrist pivoting and finagling to get up under the marshmallows for the chocolate. Not that it’s difficult, this is just fair warning for you and your friends. Actually, speculoos biscuits may be the true pro-route here.

Disclosure: Graham crackers are prone to snapping under pressure.

rubber-scraper-mvt_carmen-ladipo_cast-iron-smores_0012_1

Enjoy your premature summer treat with the crew while we wait for the 60° weather to return in New York.

rubber-scraper-mvt_carmen-ladipo_cast-iron-smores_0014

Leave any more pro tips you come across in the comments!

Mast Brothers: Genius or Nah?

Once upon a time, I had a week off from work, so I went adventuring in Brooklyn. The destination of one particular afternoon was the Mast Brothers factory of chocolate in Williamsburg. Maybe you’ve seen their chocolate bars around? Or maybe you’ve heard accusations and admittance of chocolate fraud. No matter their previous or current strategies, the Mast Brothers have crazy, inventive chocolate flavors like goat’s milk, sheep’s milk, olive oil, and vanilla & smoke. And their packaging could easily be turned into wall decoration. But I was not in town for this chocolate, no. I was in town for their chocolate chip cookies (go figure). In my quest for the perfect chocolate chip cookie, substantial research of existing artworks is imperative. I walked into the storefront, took a brief gander around the bags of cocoa beans and podiums of chocolate bars.

rubber-scraper-mvt_mast-brothers_1chocolategif

After taking a peek through the window showing the factory, convincing you to pay for the $10 tour, I circled back to the front and asked for one of the chocolate chip cookies sitting on the counter. I decided to pay for this over the tour, this time, because guess how much it was….a round $4. It was worth it though, this cookie was about the size of my face, or three normal cookies.

DSC_3569

There were no seats or tables inside, so I had to leave the premises and find a bench on the side of the street instead. To my surprise, this took about 90 seconds. The chocolate pros figured out that crispy-on-the-outside, soft-and-chewy-on-the-inside refinement, and the sea salt flakes on the top served as both decoration and general flavor enhancement. The top was the perfectly beautiful cracked texture that you see in the cookbooks. It was so delicious, and I managed to save some for later. I decided that I needed to track down the recipe for these cookies to see if any processes, techniques, or secret ingredients were applicable to my own recipe.

DSC_3585

Turns out, the Mast Brothers chocolate chip cookie recipe was no great shakes. There were no alternative mixing approaches or corn starch additions. In fact, their recipe didn’t even call for vanilla.

DSC_3650_1

Even so, I was confident that my cookies would turn out great, and excited to compare previous recipes. What resulted was a batch of perfectly smooth, large cookies that were less exciting than my current chocolate chip recipe.


rubber-scraper-mvt_mast-brothers_2.jpg
Pro tip from me: add the chocolate chips before all the flour is incorporated


Perhaps it was the fact that I did not use Mast Brothers chocolate, but probably not. There are always some variables that are unaccounted for, like evenness in your oven’s heat, oven heat in general, type of butter, and mixiness.

DSC_3664

Moral of the story: You should always feel free to tweak the recipe to your own taste. Things won’t necessarily come out how you think they will/like in the restaurant.


Mast Brothers Chocolate Chip Cookies
From Mast Brothers Chocolate: A Family Cookbook

Ingredients
1 cup (2 sticks) unsalted butter, room temperature
¾ cup brown sugar
⅔ cup white sugar
2 eggs
2¼ cups all-purpose flour
1 teaspoon baking soda
1 teaspoon sea salt
15 ounces dark chocolate, chopped
fleur de sel, for topping

Directions
In a large mixing bowl, cream softened butter with both sugars until fluffy. Blend in eggs one at a time. Add flour, baking soda, salt and chocolate and combine.
Spoon out cookie dough on baking sheets using tablespoons. Sprinkle sea salt to your preference. Bake at 350° for 15 minutes or until golden brown. Cool on wire rack.

DSC_3701.jpg
Not fleur de sel. And I learned that adding the salt before baking will help it stick.
DSC_3720.jpg
Good with milk, of course.

 Have any perfected chocolate chip cookie techniques? Spill!

Chocolate Raspberry Cupcakes with Speculoos Frosting

This weekend I wanted to see how to make a filling or frosting out of speculoos that was less intense than the spread itself. The only way to do this more or less was with cupcakes…challenge accepted. Chocolate seemed most appropriate, and I had some chocolate chips from a photo shoot at work to use up (pics to come). I discovered that your typical frosting additions do not particularly help the spec-situation, and ended up with acceptably tasting, yet strangely textured speculoos “frosting”. I feel a civic duty as a self-proclaimed food blogger to share my culinary efforts, both successful and otherwise, to illustrate precisely what and what not to do in abnormal baking practices. So learn from my mistakes so you don’t have to make them yourself 😀

DSC_3041  First up: get your jar of speculoos into the bowl. This was almost the whole jar, but I used 1 cup. You’ll need an electric mixer or kitchen stand to get the spread whipped.

DSC_3042DSC_3054

See the color change? Good! I should have stopped there and forgotten the rest but….NAH

 Check out this gif! Gonna try to make this a thing, hopefully better. Not bad for a last-minute decision, though.

carmen-ladipo-rubber-scraper-movement-cupcakes

Cue heavy cream. Except don’t, because this will happen. As they say, don’t fix it if it ain’t broke! I think with just some powdered sugar and more mixing it would have been 👌. So don’t add heavy cream. Maybe don’t add sugar either because it’s all so sweet to begin with.

carmen-ladipo-rubber-scraper-movement-cupcakes

K moving right along…the cupcakes themselves were really great so we’ll get right to it. There was no cocoa powder in this recipe and just a half cup of chocolate chips. Melt with butter and you’re good to go.

DSC_3073

Time for whisking! With a fancy pointy whisk that is much easier to wash than the normal round ones.

carmen-ladipo-rubber-scraper-movement-cupcakes

More whisking with the cute should-have-sifted-these-together-but-didn’t mini whisk

carmen-ladipo-rubber-scraper-movement-cupcakes

Mix it up

carmen-ladipo-rubber-scraper-movement-cupcakes

Add crushed raspberries

carmen-ladipo-rubber-scraper-movement-cupcakes carmen-ladipo-rubber-scraper-movement-cupcakes

Check it out – before rubber scraper, after rubber scraper!

carmen-ladipo-rubber-scraper-movement-cupcakes

How cute. So moist and dark.

Chocolate Raspberry Cupcakes with Speculoos Frosting
This is what I would recommend you to do. Everything described is how it went down, except for the frosting. If you have better luck with yours, leave a comment below and tell me about it!Makes 12 cupcakes

Cupcakes
1/2 cup unsalted butter
3 oz bittersweet chocolate (~1/2 cup chips)
2 eggs
1/2 cup sugar
1 teaspoon vanilla extract
1/2 teaspoon salt
3/4 cup flour
3/4 teaspoon baking powder
1/2 teaspoon baking soda
1 handful raspberries

Frosting
1 cup speculoos, or cookie butter from TJ’s

Directions
Melt the butter and chocolate together with a double boiler. You can also microwave them. Make sure you mix well if you do this. In a large bowl, whisk the eggs, sugar, vanilla and salt together. In a separate bowl, whisk the flour, baking powder, and baking soda together. Add these dry ingredients in increments to the egg mixture. Add the chocolate and butter in two rounds, still using a whisk. Mash up the raspberries; you can use a potato masher, a fork, or your hands. Just make sure to get all the juice.
Pour the batter into a muffin tin lined with paper, two thirds to three quarters of the way up. Place in the oven at 350° for 18 minutes.

For the frosting, put the speculoos in a stand mixer with the paddle attachment, or large bowl, using an electric mixer. Mix on medium speed until the color has gotten much lighter and the speculoos is less dense. Add some powdered sugar if you dare. Once the cupcakes have cooled down, spread the frosting on the cupcakes and enjoy!

carmen-ladipo-rubber-scraper-movement-cupcakes

Grab some milk. You’ll need it.

Pop Quiz


     I think we all have some room to improve our popcorn consumption. When eaten responsibly, it has many health benefits: a surprisingly high concentration of antioxidants, fiber, whole grain heartiness, plus it’s low in calories. But if you go for the microwaveable movie popcorn, or sticky kettle corn, you’re filling your body with things less than good for you: trans fats, high fructose corn syrup, artificial flavors, funny chemicals from the microwave bag, and coloring. Coloring? It’s so much better for your body and taste buds to make your own popcorn. It’s not as hard as it sounds! I took some time to answer my own questions about the easiest ways to make popcorn, and what to do with it after. Here’s some inspiration for popping, seasoning, and snacking your way through your Netflix queue.


Can you really use a brown paper bag to make popcorn?

Short answer: Yes!
Long answer: You sure could, but I don’t think it’s the easiest way. It’s definitely not the neatest! Here’s a recipe from Serious Eats

1/2 cup popcorn kernels
1/2 teaspoon oil
Pinch of salt

Put everything in a small bowl to get all the kernels covered in oil. Place in a brown paper bag, then fold over well enough so it doesn’t open in the microwave. Place in microwave on high for 2 minutes, or until there are two seconds between pops.

I folded the bag like this, and it stayed very sealed in the microwave. Now you’ve got your popcorn in a bag. Hopefully the bottom didn’t burn like mine did. You can probably practice this method until you’ve got it down to no burning and minimal unpopped kernels, but there’s also another way, which we’ll get to.


What is nutritional yeast, and why should I put it on my popcorn?


Short answer: A cheesy topping to liven up the party.
Long answer: Technically, yes, nutritional yeast is a yeast of sorts, except it won’t make your bread rise. It’s full of amino acids and potassium, and has something of a cheesy taste to it. My friends introduced this combination to me, and a lot of people do it, but it’s a taste I’m still acquiring. Try it as a cheese substitute and see what you think. I’m pretty sure you can find it by the spices in your grocery store.


Can I make dessert popcorn myself, too?


Short answer: Yes, and it tastes darn good.
Long answer: Just microwave some dark chocolate, throw in a touch of butter if you want, drizzle it over your bowl of popcorn, toss that bowl of popcorn, lay the popcorn out flat onto parchment paper, and throw in the fridge for a bit so the chocolate can harden up. If you want, you can wait for it to get to room temperature when you take it out, or you can eat up! Try drizzling some peanut butter in there if you want. Dessert-y, but not overwhelmingly sweet or messy! Still airy and awesome.


What’s the best way to make popcorn?

Short answer: Over the stove.
Long answer: Grab a pot, cover the bottom with oil (vegetable oil, olive oil, even coconut oil). Let that heat up a bit. Add some salt – and some sugar if you want to go the kettle route – and the popcorn kernels; just enough to cover the bottom of the pot, or less (or more if you trust your popcorning instincts). Set the heat to high, and wait for the kernels to pop, constantly moving the pot over the heat to avoid burning, and allow the unpopped kernels to fall to the bottom. Remove from heat when two seconds separate the popping. There will probably be some stray pops anyway. Once you’ve transferred the popcorn to a bowl, you can add more salt, sugar, butter, or any other seasoning you want. Get creative! If you want to add butter, just melt some in the pot you just finished using.
This method yields as much as you want, and has a great crisp texture/fresh taste. In my opinion, better than the microwave method.


Making your own popcorn is really not as scary as it might seem. And if that’s not reason enough, buying popcorn kernels instead of the microwaveable stuff is WAY cheaper. Impress your friends at your next party with your own snack creation. They will probably be inspired to make their own.
Happy popping!


Bonus:
What do I do with leftover popcorn?
Answer: Fold them into your cookies!

Black Bean Brownies

     If you know me, you know that I’ll eat close to anything that you put in front of me: meat, gluten, cream, sugar. This means that I steer clear of recipes that have anything to do with gluten-free, vegan, or dairy-free diets. But when my friend told me about a nice black bean brownie another friend made, I wanted to attempt the impossible: use a vegan or gluten-free recipe that does not fall apart, and tastes GOOD. Not okay, not acceptable, not sufficient-for-the-top-of-my-cereal, but genuinely enjoyable. Well, friends, I think I did it. I made (almost) vegan AND (actually) gluten-free brownies, that mostly stayed together, and that I was pretty impressed with. Do they taste like regular brownies? No. But they are still nice and fudgy and very filling. Even if you’re on a see-food diet, I dare you to take a crack at these healthy baked goods and restore your faith in the edible options within dietary restrictions.

A cup of beans is about 2/3 of a normal sized, 15 oz can. Drain and rinse!
New to vegan? You may be new to flax eggs…just a tablespoon of flaxseed meal and 2.5 tablespoons of water. Mix, and let sit.
So I don’t have a food processor, but that’s okay! Blend/purée the beans to the best of your ability. Mine came out like this and were totally cool.

The final batter looks somewhat like this. Not at all runny, but not wet cement, either. Chunky is also okay.
The recipe should get you through a whole tin of muffins, if you fill each spot about halfway.

Friendly reminder to reacquaint yourself with your handy-dandy scraper!

Black Bean Brownies
Can be made vegan and are naturally gluten-free
Makes 12 brownies

Ingredients
1 cup black beans, drained and rinsed
2 tbsp flaxseed meal and 1/4 cup + 1 tbsp water, for two “flax eggs”
2 tbsp melted butter (or coconut oil for vegan variation)
1 tsp vanilla extract
1/2 cup cocoa powder
1/2 cup sugar
1/2 tsp salt
1 tsp baking powder
1/4 cup milk (or water for vegan variation)
Crushed walnuts for topping

Directions
-Oven temp will be 350 degrees F. Preheat accordingly.

Drain out the black beans from the can, and rinse. Measure out a cup, and place in a food processor. Before you process the beans, combine the flaxseed meal and water for the equivalent of two “flax eggs”. Set aside.

No food processor? No problem. Try a combination of blending, and manual power. Get creative with some microwaving if it helps. Once the flax mixture has been sitting for a few minutes, add it to the black beans with the butter or other oil, and vanilla extract.

Add the dry ingredients gradually, while alternating with the milk or water, so the batter ends up at a good consistency – not as thin as regular brownie batter, but not wet cement. If you have a food processor, you can do it all in there. If not, a wooden spoon does just fine.

Put the batter in a greased muffin tin, then sprinkle with walnuts. Place in the oven for around 25 minutes. The center will no longer be wet and runny. Let cool in the pan, then carefully remove the brownies with a fork and/or small spatula, and transfer to a wire rack or plate. Warning: this will likely prove difficult, so be careful and have patience. They might fall apart anyway.

They remind me of those brownie snacks you buy that come in the small packets for your lunchbox.
Enjoy! Shout-out to Iris and Cameron for the recipe.
Adapted from Minimalist Baker

The Best Chocolate Chip Cookie, pt. II


      Here it is; I promised the next installation of The Best Chocolate Chip Cookie, according to, well, me. Part of the problem here is that cookie eaters have different preferences in a cookie, so it’s hard to say there’s one “best” cookie. But I am close to the best one, for the typical food appreciator’s palate. There are so many things that can be done differently in a CC cookie, so I plan to slowly break down the options and results. The first thing I wrote about was the chocolate in a cookie. I should also be referring to these cookies as chocolate chunk cookies. I have since read somewhere that chunks are better anyway, especially since a lot of chocolate chips have things other than chocolate/milk/sugar. BOO! So take it from the professionals: chunks > chips. A lot of other chocolate-related things were discussed in the first part of this post, check it out here. Otherwise, prepare for some technique talk.

     Today is about butter. If you’ve ever browned butter before, you’re familiar with the aroma and taste that comes with it: caramely, butterscotchy, awesome. It can be tricky at first to not burn it, but once you get the hang of it, it doesn’t take too long, and it’s worth the elevated flavor that comes with it.

     Today is also about time. Time is of the essence as much as that vanilla extract is.

     A friend in San Francisco showed me a chocolate chip cookie recipe from a well-known baker in the city, Josey Baker (yeah, his last name is Baker). He’s famous for his breads and $4 toasts in the hip SF cafés, but his chocolate chip cookie recipe also knows what’s up. His calls for all the butter to be browned. This gives the whole cookie a new web of flavor. At first, it hits you in the face. But once you’re used to it, you only notice when the brown butter is missing. This is how cookies should be: brown-buttery to perfection.

     If your butter looks like this on the stove, you’re close, but not quite to browning. Make sure you keep stirring. Melt the butter on medium heat, and this bright yellow color will come after much foaming has subsided. Not long after, the color will begin to change and the little bits of milk solids that have appeared will go from white to brown. As soon as this happens, move the butter to a new vessel so it stops cooking. There you go, brown butter. I’ve read some recipes that say to discard the milk solids – don’t do it!! That’s where all the caramely goodness is. It won’t poison you!

Once all is done, it should look something like this.

     When I say time, I’m talking about baking time. Josey Baker said something pretty interesting:
     “You should probably take the cookies out before you think they’re done.”
He was on to something. Read on.
     “You’ll know they’re done when they’re a beautiful light brown; the middles will still look a little gooey, but the outsides will push back ever so slightly when you poke them with your finger.”
     Now, I’ve found that this is kinda dependent on when you plan on eating the cookies. If you’re curing a cookie fix and are planning to finish half the batch right away, you can probably keep the cookies in the oven a little longer. When you use Josey’s technique, the cookies take a long time to properly set; i.e be able to pick up without the whole cookie falling apart onto the counter. On the other hand, if you have time, the “undercooking” is great for assuring chewy cookies in days to come. I put “undercooking” in quotes because the cookies aren’t really undercooked. Once you take them out of the oven to cool, they’re still cooking slightly from the hot baking sheets, anyway. Moral of the paragraph: take the cookies out about 2 minutes before you normally would. If you’re squirming in your apron, go ahead and put them back in for a minute.

     Okay enough science, here’s an updated chocolate chunk cookie recipe for you! I’ve been making small batches recently so that 1. We don’t eat as many in the same amount of time, and 2. I have more opportunities to play around with different versions. So feel free to double this recipe.


Chocolate Chunk Cookies
Makes about 25 cookies

1/2 cup (1 stick) unsalted butter, browned
1/4 cup white/cane sugar
1/4 cup brown sugar
1/2 teaspoon vanilla extract
     ~combine these ingredients after the butter has cooled slightly.
1 egg
     ~mix into above ingredients

1 cup flour
1/2 teaspoon baking soda
1/2 teaspoon salt
     ~gradually sift these into the wet mixture, mixing until smooth

1 cup semi-sweet chocolate chunks
1/2 cup milk chocolate
2 tablespoons cocoa nibs (optional)
     ~incorporate into dough

Chill for at least two hours in the fridge. Then place teaspoonfulls on baking sheets and place in an oven at 375 degrees for 6-7 minutes, or longer for larger cookies. When the edges have rounded out but the centers still look shiny, take the cookies out and breathe. Wait for some time for the cookies to set. This won’t be when the cookies have cooled, but after. Feel free to transfer to a different flat surface. Enjoy!