Some Très Belle Brunch

     Yeah yeah, I’m back from limbo, but mostly school. But before we get into the summer, let me squeeze in one more post from spring break about Bella’s and their breakfast/brunch/lunch menus.
     Bella’s breakfast menu ranges from shrimp & grits to a smoked salmon omelet. The brunch menu changes for every weekend to stuff their French toast differently or switch up the pancakes, and nothing on the lunch menu will leave you half empty.

Homemade Black Bean Veggie Burger with tabouli

Grilled Chicken Souvlaki Wrap sans wrap

French toast with fancy liquored-up, caramely maple syrup, coconuts and
bananas waiting at the bottom

If you’re ever in the New Haven area and feeling swanky, stop by Bella’s for a meal or three.

Once Upon a Time…

…I made lemon cupcakes with my mom. Couldn’t miss this one, I took out the big guns for pictures. Enjoy the gallery and enjoy the combination of recipes used.

Really dense batter from a Cupcake Wars recipe
Could easily have put half the batter in there
#kitchenaidlessproblems
Nah…looks good to me
Significantly larger than it looks
Lemon Blueberry Cupcakes with Lemon Cream Cheese Frosting (without the blueberries)
Cupcakes

Ingredients
3 1/2 cups all-purpose flour
1 teaspoon baking soda
1/2 teaspoon salt
2 sticks butter
2 cups sugar
3 eggs
1 teaspoon vanilla extract
Zest of 1 lemon
2 cups sour cream
1 1/2 cups fresh blueberries

Directions 
Preheat the oven to 350 degrees. Line cupcake tins with 24 paper liners.

Mix the flour, soda and salt together in a bowl. Set aside. Add the butter and sugar to a mixing bowl and cream until light and fluffy. Add the eggs 1 at a time and mix thoroughly. Add the vanilla and lemon zest and mix to combine. Add the dry mixture in 3 parts alternating with the sour cream, ending with dry mixture. Stir in the blueberries. Fill the prepared tins two-thirds full and bake 16 to 20 minutes. Cool.

Lemon Cupcakes with Lemon Buttercream Frosting
Frosting
1 cup unsalted butter, softened to room temp.
3 1/2 cups confectioners’ sugar (have an extra 1/2 cup on hand, just in case)
1/4 cup half & half cream
1 teaspoon pure vanilla extract
1/4 teaspoon of salt
1 teaspoon finely grated lemon zest
3 Tablespoons fresh lemon juice
In the bowl of a stand mixer, fitted with the paddle attachment, beat the butter on medium speed until light and fluffy (about 3-5 minutes). Slowly begin adding the sugar, and beat until well combined. Beat in the cream, vanilla, and salt. Once combined, turn the mixer up to medium speed and beat for about 3 minutes straight. Turn the mixer down to low and add the lemon zest and lemon juice. Beat for another 3 minutes until the frosting is fluffy and light. [Note: If the frosting looks too thin, add that extra 1/2 cup of sugar. If it’s too thick, add a splash of cream, and beat to combine.]  
Recipes found here and here
Alright time to get profesh with the frosting
Photo tip du jour: tilting is winning (if not overused)
Pretty > practical
lolemon…

What To Do With Quinoa

I guess there are a lot of things, but stuffing peppers is a good way to go. With Colleen’s quinoa, Kelly’s olive oil and pineapple, and Jonathan’s supervision, a late night dinner was served. I think the pictures say the rest…

Pinto beans, carrots, onions, heck throw in some pineapple

#collegeproblemzzz: Chocolate Chip Cookies

Typical dorm life issue: You want to make cookies (make cookies), so you get out all your non-perishables from the closet, and forget you don’t have any butter or eggs.
Rats! Or, maybe that’s not generally a problem because why would you have flour, sugar and chocolate chips without butter and eggs?  If you’re anything like me, then you enjoy baking from scratch and won’t know when the urge will hit you. In these cases, it would be convenient to use eggs regularly enough that they don’t expire before you finish, and…well I guess you don’t have the same problem with butter. But I had no eggs, I had no butter, and I wasn’t about to drive to Wegmans in order to make cookies.
For whatever reason, however (specifically doughnuts…), I had some vegetable oil hanging around. There was hope yet! After Googling something like “no egg butter chocolate chip cookies” I eventually came across the Post Punk Kitchen, advertising their expertise on vegan cooking. I generally steer clear of vegan and gluten-free things, as a byproduct of their ingredients (or lack of) is more healthy, less dangerous and delectable. But I really didn’t have a choice since nothing I had to work with was/came from something that ever had legs. You know when they say don’t judge a recipe by its picture? That’s right – they don’t, because it’s surefire way to predict your success (totally).
I’ve attacked this recipe twice now, and let’s just say practice makes perfect. If you are missing butter from your fridge If you are a college student living in a dorm, then there’s a fair chance you won’t have tapioca flour hanging around like this recipe requests. If you are thus concerned for your cookies’ integrity, then you can replace the tapioca flour with something sticky like peanut butter or bananas. As long as you follow the instructions, and take care in catalyzing the “chemical reactions”, you should be good to go. Don’t be like me and assume efforts to mix the oil into the sugars are for naught. They’re not. Your cookies will taste better than the tube of dough your neighbors are buying from the campus convenience store.
Disclaimer: This, of course, depends on your substitute for the tapioca flour; not sure you even need one. If you use half a pinkie’s length of banana, you will have banana cookies with some chocolate chips. You’ve been warned.
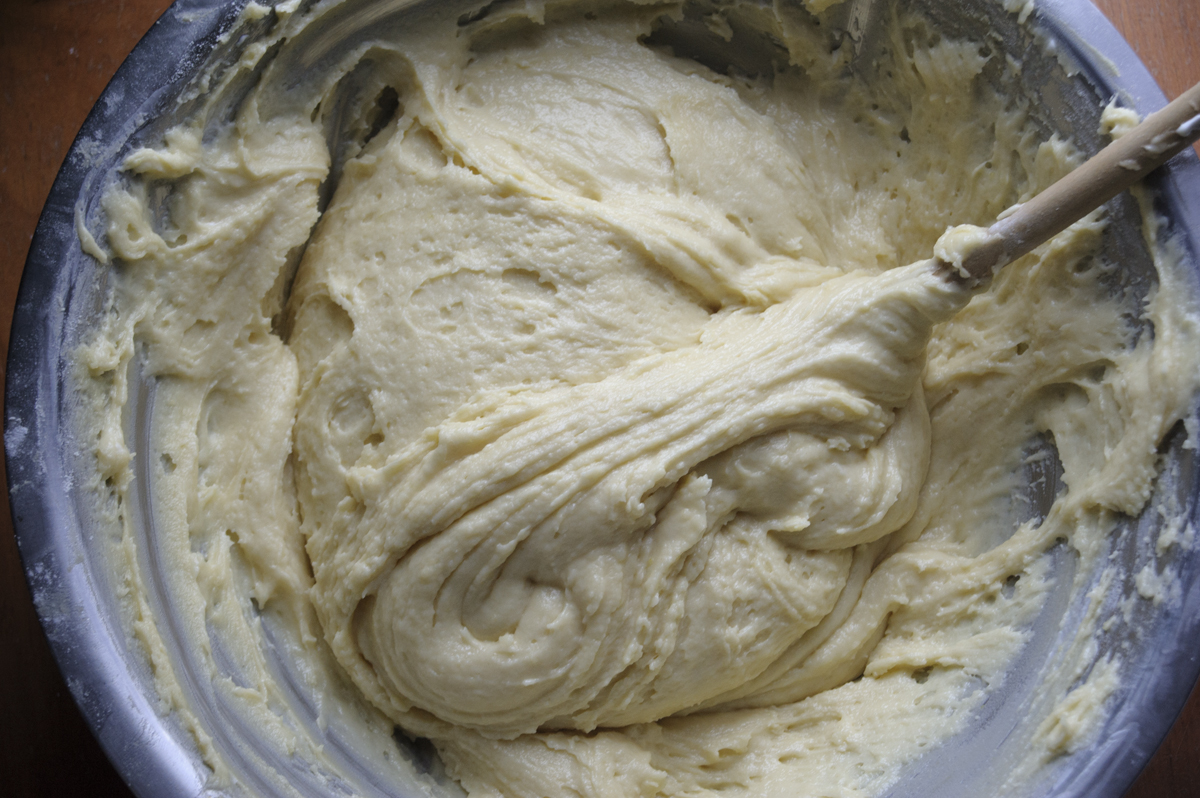
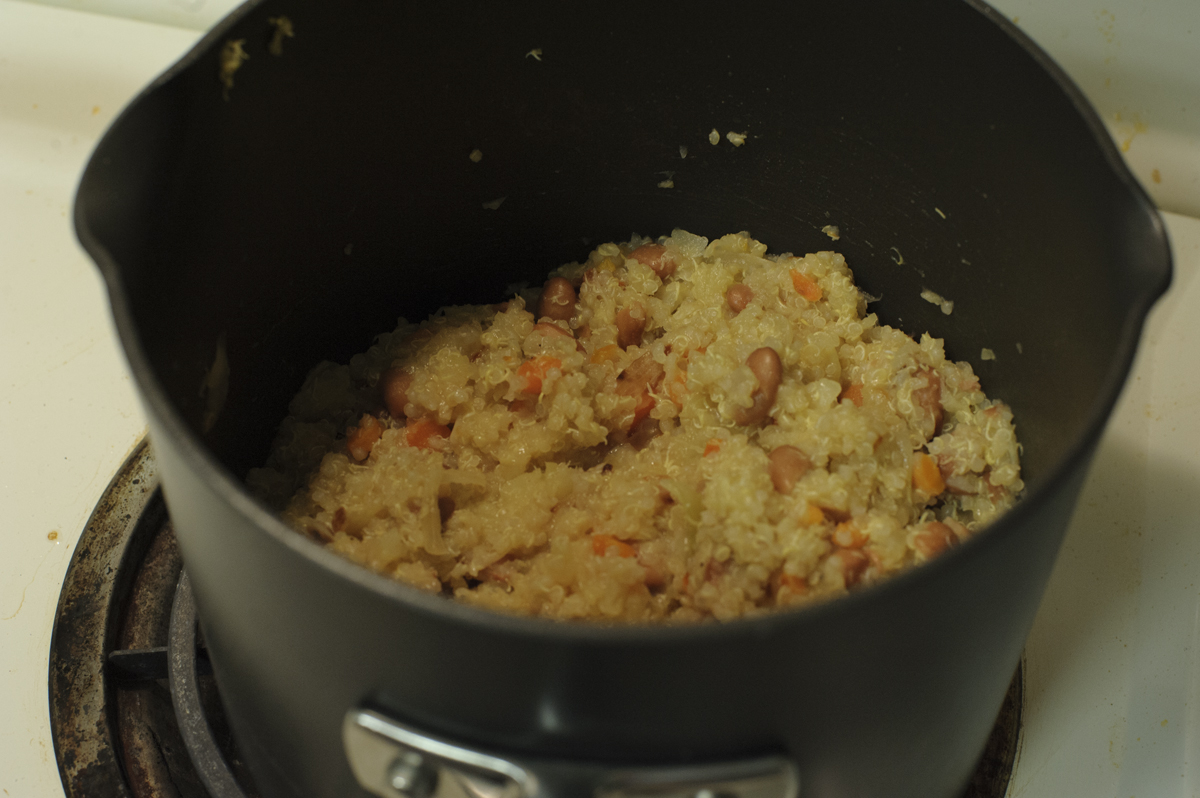
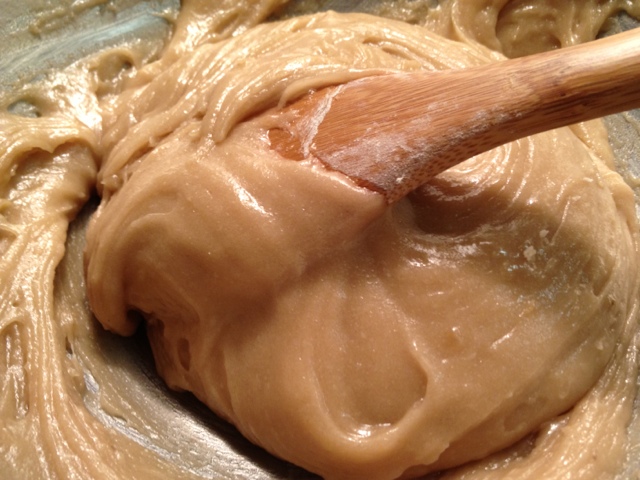
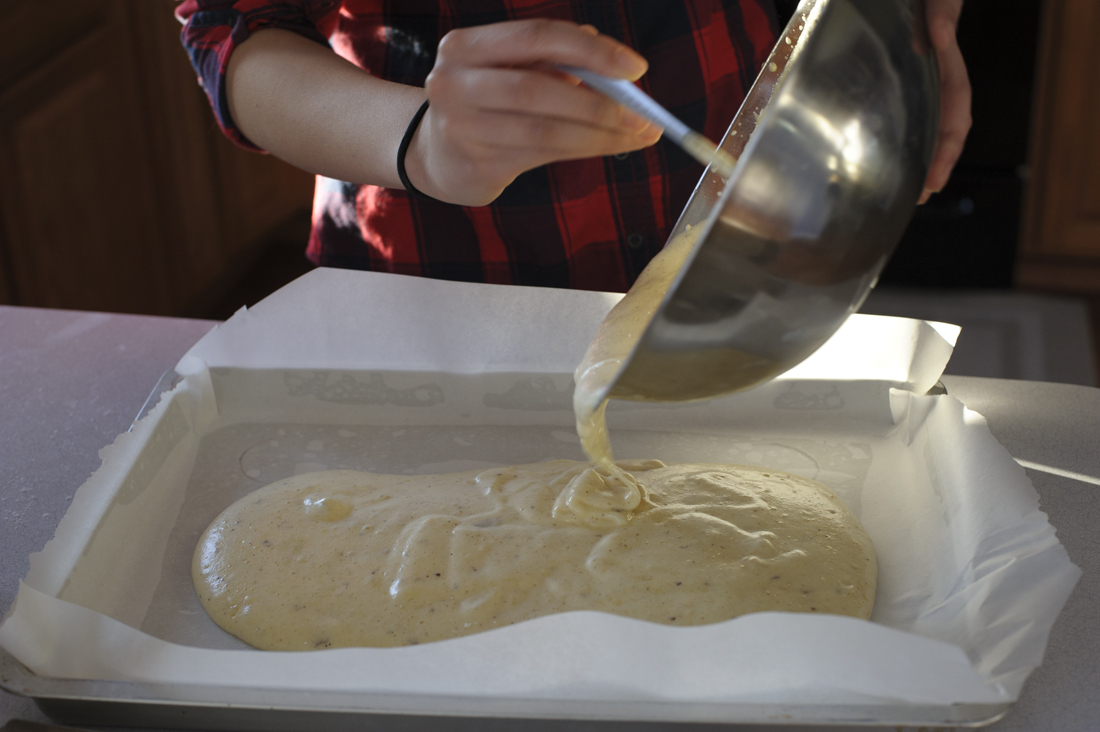
Pools of oil: BAD
Homogenous velvety smooth “dough”: GOOD
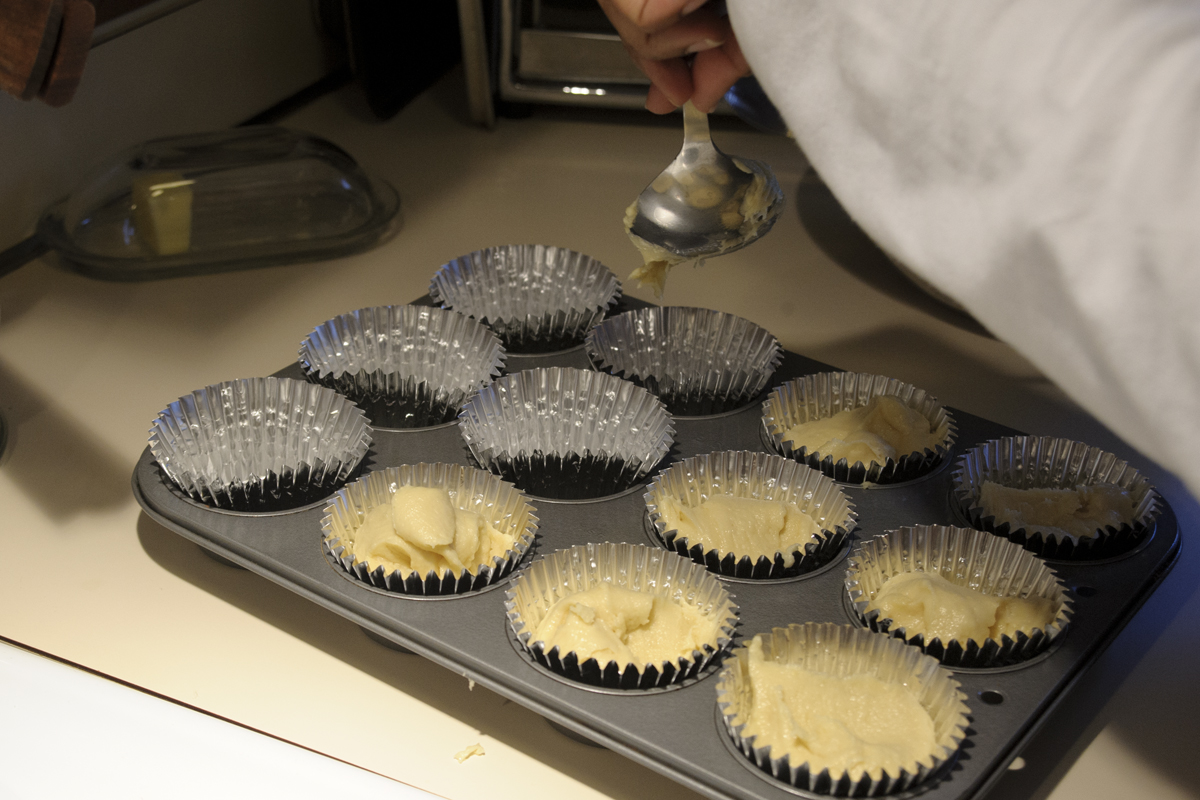
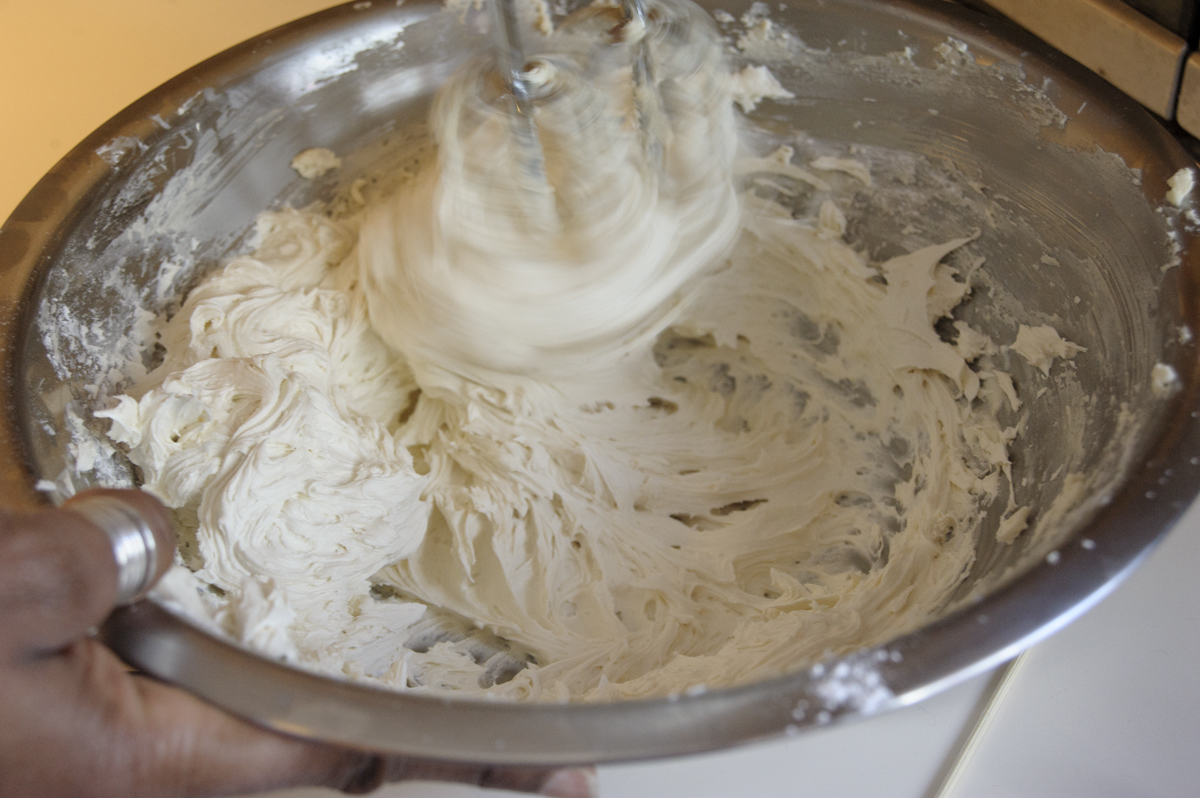
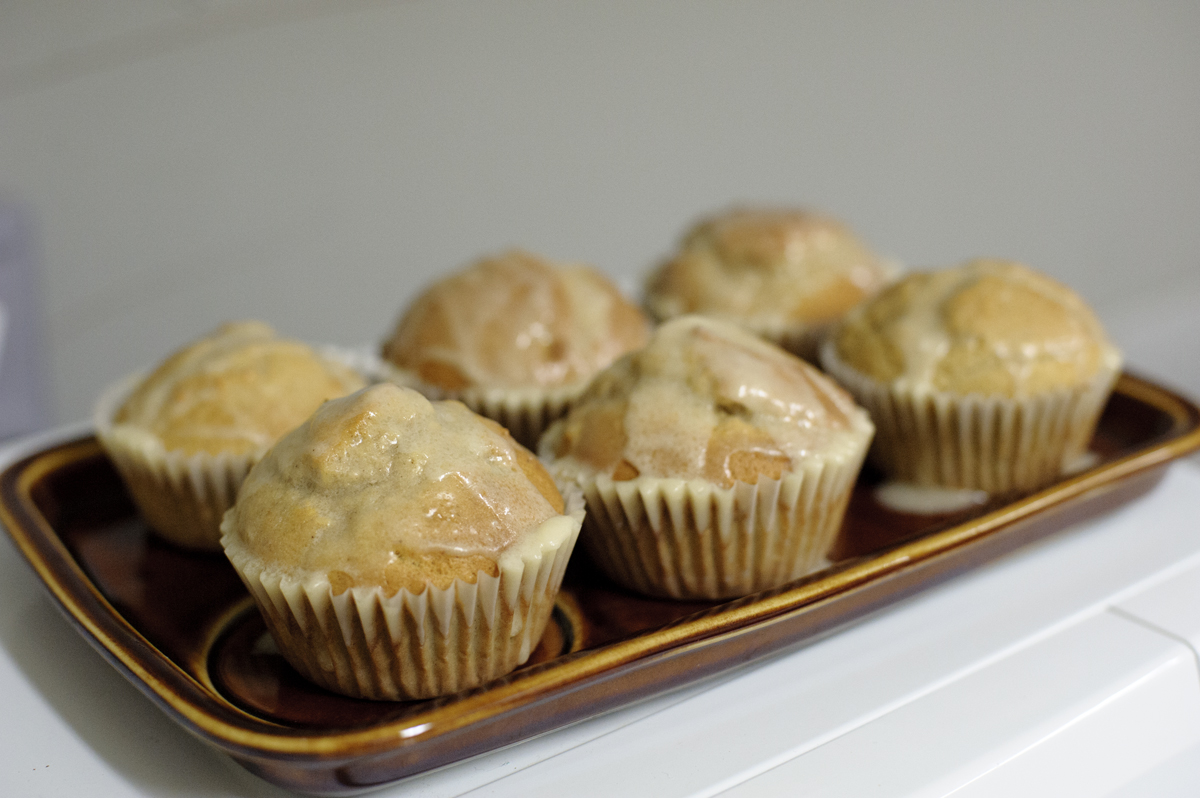
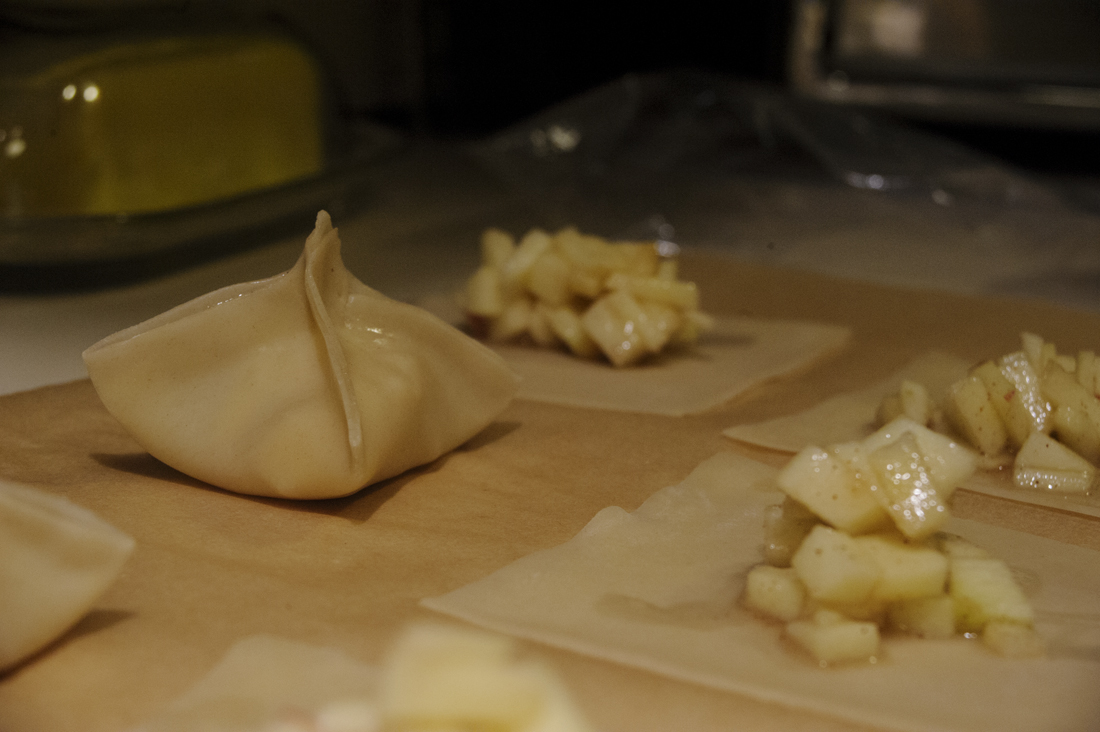
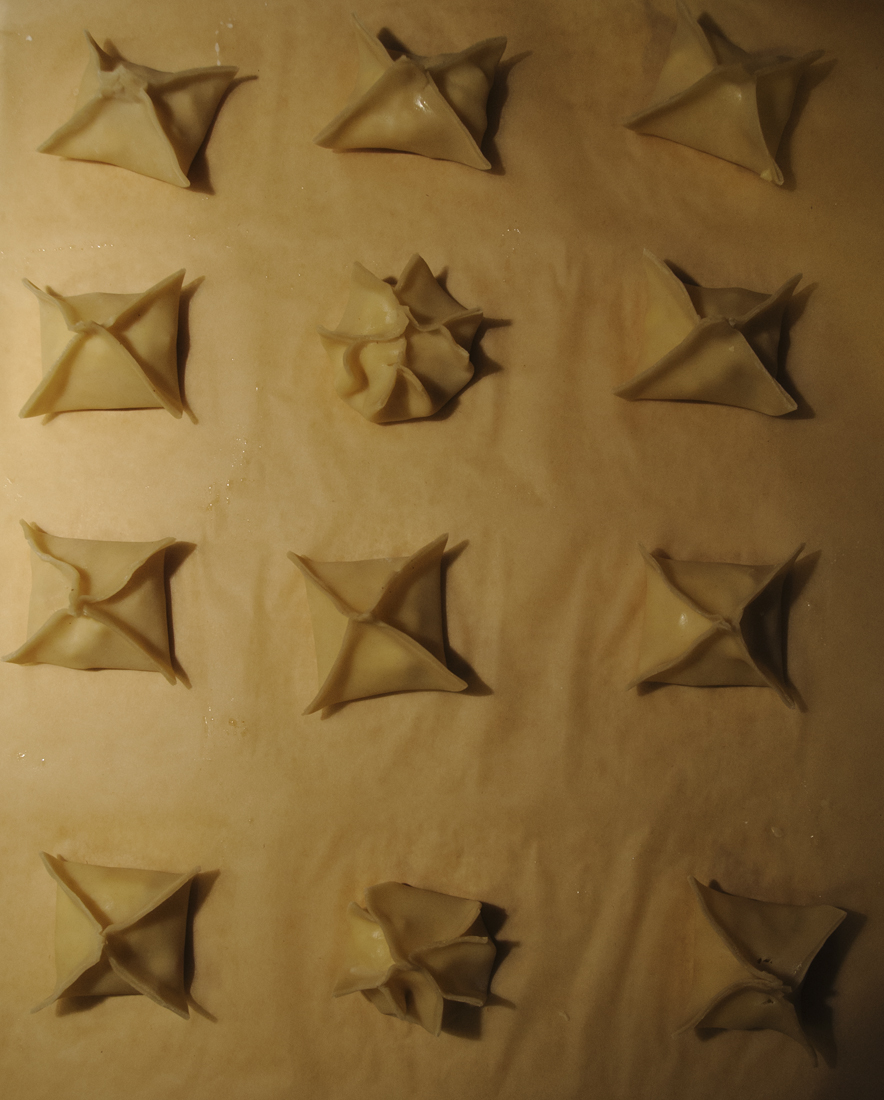
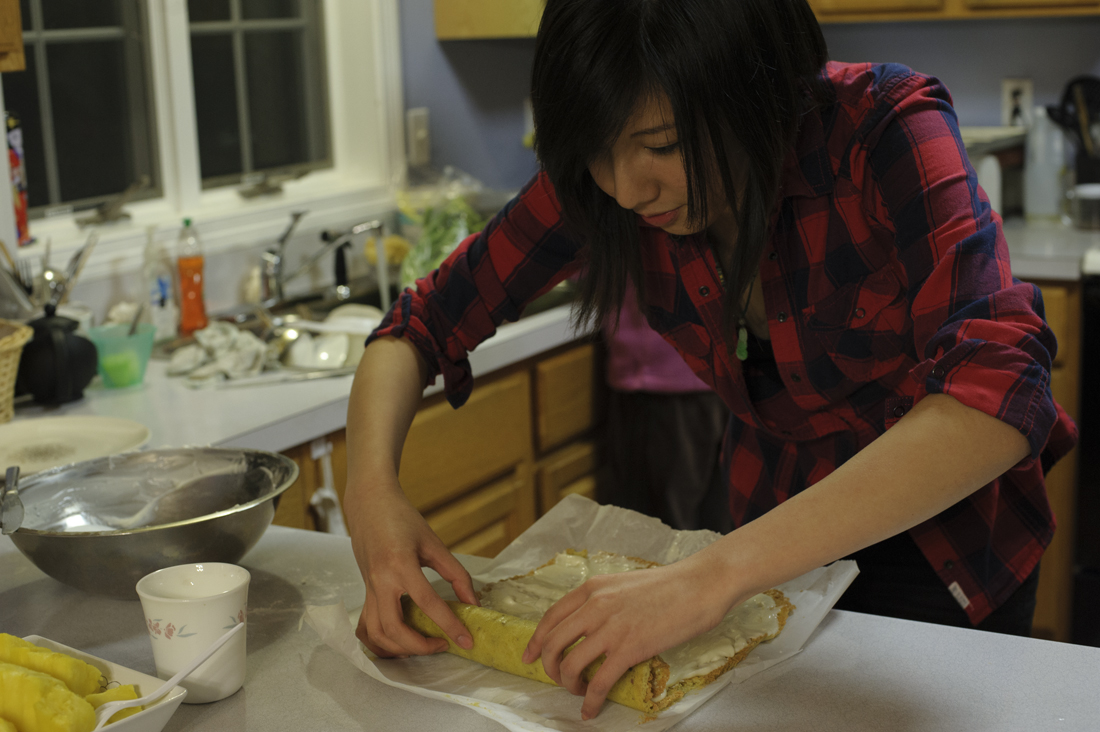
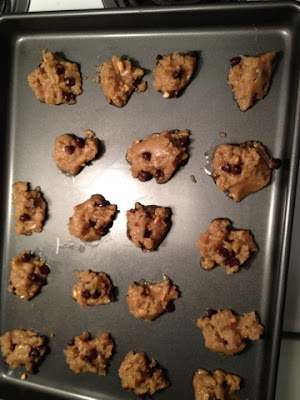
Your cookies should look more like this
Less so like this: they may slip out of your fingers

Chocolate Chip Cookie (no eggs, no butter)

1/2 brown sugar
1/4 white sugar
2/3 cup canola oil
1/4 cup unsweetened almond milk (or your favorite non-dairy milk)
1 tablespoon tapioca flour
2 teaspoons pure vanilla extract
1 1/2 cups all purpose flour
1/2 teaspoon baking soda
1/2 teaspoon salt
3/4 cups chocolate chips

Preheat oven to 350 F. Lightly grease two large light metal baking sheets.
Mix together sugars, oil, milk and tapioca flour in a mixing bowl. Use a strong fork and mix really well, for about 2 minutes, until it resembles smooth caramel. There is a chemical reaction when sugar and oil collide, so it’s important that you don’t get lazy about that step. Mix in the vanilla.
Add 1 cup of the flour, the baking soda and salt. Mix until well incorporated. Mix in the rest of the flour. Fold in the chocolate chips. The dough will be a little stuff so use your hands to really work them in.
For 3 inch cookies, roll the dough into about ping pong ball size balls. Flatten them out in your hands to about 2 1/2 inches. They will spread just a bit. Place on a baking sheet and bake for about 8 minutes – no more than 9 – until they are just a little browned around the edges. I usually get 16 out of these so I do two rounds of eight cookies. Let cool on the baking sheet for about 5 minutes then transfer to a cooling rack.
For 2 dozen two inch cookies roll dough into walnut sized balls and flatten to about 1 1/2 inches and bake for only six minutes.
Brought to you by PPK

How Many Different Ways Can You Spell Doughnut?

How about with some Fs? You know, like duffin! That’s what Torey, Tommy and I made one or two busy weekends ago. This adventure is proof that inspiration can come from anywhere – in this case, instagram. Yes, I do in fact shamelessly take pictures of my food and share with the world (http://instagram.com/carmzl). Don’t be envious of my food and picture snapping skills, there’s a good chance whatever you find in there will end up here so you might as well think of it as a preview of lovely recipes to come.
     So doughnut muffins. A doughnut or a muffin? I’ll give you a hint: You can usually go by the last word. So when you add nutmeg and muffin stuff to muffins, and glaze them, they’re gonna taste like muffins. With some doughnut…essence. I think we were envisioning light and fluffy “muffins” that were really doughnuts in disguise…more like muffins disguised as breakfast. Except they were also breakfast. Uh anyway, they’re pretty easy to make, and as long as you’re expecting muffins, you’ll likely enjoy them. The glaze was definitely the best part.

I promise I helped – there’s even proof
Look at that texture
Is that me? In my own blog?! The scary things that happen
when I share the camera
Per the request of Torey
Wasn’t lying about the glaze…
Next time we’re making doughnuts…no Fs included

Glazed Doughnut Muffins

For the Batter

1/4 cup butter
1/4 cup vegetable oil
1/2 cup granulated sugar
1/3 cup brown sugar
2 large eggs
1 1/2 teaspoons baking powder
1/4 teaspoon baking soda
3/4 to 1 ¼ teaspoons ground nutmeg, to taste (I used 1 ¼)
1 teaspoon cinnamon
3/4 teaspoon salt
1 teaspoon vanilla extract
2 2/3 cups all-purpose flour
1 cup milk

For the Glaze

3 tablespoons butter; melted
1 cup confectioners’ sugar; sifted
3/4 teaspoon vanilla
2 tablespoons hot water

Directions

  1. Preheat the oven to 425°F. Lightly grease a standard muffin tin. Or line with 12 paper muffin cups.
  2. In a medium-sized mixing bowl, cream together the butter, vegetable oil, and sugars till smooth.
  3. Add the eggs, beating to combine.
  4. Stir in the baking powder, baking soda, nutmeg, cinnamon, salt, and vanilla.
  5. Stir the flour into the butter mixture alternately with the milk, beginning and ending with the flour and making sure everything is thoroughly combined.
  6. Spoon the batter evenly into the prepared pan, filling the cups nearly full.
  7. Bake the muffins for 15 to 17 minutes, or until they’re a pale golden brown and a cake tester inserted into the middle of one of the center muffins comes out clean.
  8. In a medium bowl, prepare the glaze by mixing together the melted butter, confectioners’ sugar, vanilla and water. Whisk until smooth.
  9. When muffins have cooled slightly, dip the muffin crown into the glaze and allow the glaze to harden. As recommended in the adapted recipe, I glazed my muffins twice.
  10. Serve warm, or cool on a rack and wrap airtight. Muffins will keep at room temperature for about a day.

Brought to you by one SemiSweetie

To Ramen or to Ramen

You’re a poor college student getting ready to replenish your stash of instant ramen cups – don’t do it! Let me suggest a more healthy and more taste-bud-thrilling option. You’ll still get your ramen, but you won’t get the unpronounceable ingredients list in your body. You have a couple options, but one main path to success.
1. Go to a grocery store and get a packet of ramen noodles, not pre-packaged to just nuke&go, but to boil in hot water or a microwave for a while.

Okay okay, not ramen per se, but I’ll tell you a secret – it doesn’t actually matter
2. Steal vegetables from the salad bar in the dining hall Go get vegetables to add to your noodles, in place of the vegetable flavoring powder. Peppers, tomatoes, carrots, onions, broccoli etc will do. Also mushrooms.
3. You can either cook the vegetables in oil until they smell good or leave them to put on top after the noodles are done. If you want to cook them, you can add some oil to whatever you can put on the stove — pot, skillet etc (hopefully you have a pot for the noodles, though)

If this counts as sautéing, then do that.
4. Boil water in a pot and then put the noodles in for 4ish minutes, or as long as the directions say. Yeah, don’t throw out the package.

Good to practice your guesstimating
5. Make sure the noodles as soft as you want them, then drain the water and place in a bowl. Add the vegetables with whatever other fixings you want like soy sauce, that red rooster sauce, salt/pepper etc.
Doesn’t that just look so much healthier?

That’s the basic rundown if you are culinarily challenged. Other variations include making a broth with the miso soup packet things (significantly less unhealthy than styrofoam noodle cups) with the water, cooking the vegetables with the noodles, and making a real broth with meat and everything (lol).
If you’re hard up for real cookware, you can put the noodles in a bowl with water and microwave them until the water is boiling, and add a miso packet to have soup. Anything like this is better than the Maruchan Ramen in the campus convenience store. Sure, it’s “convenient”, but if you take 7 more minutes, you can make a real meal and have some for tomorrow. Read that essay while the noodles cook.
*Special thanks to Tommy for being as good a cook as I am a baker 😛

Ithaca Dining Installment #3: ZaZa’s Cucina

We’re gonna pretend that I’ve posted something within the last month and smoothly transition into cardiac arresting Italian food. Rebecca and I took Jonathan out for his birthday to ZaZa’s Cucina, home to “authentic Italian cuisine”. Even though the outside of the place looks like a literal hole in the wall, once you step inside, you best hope you’re not wearing jeans. JK you could probably wear jeans, but it would not be strange to put on the fancy clothes. Jonathan had the pumpkin ravioli with caramelized onions, hazelnuts, and goat cheese.I think it was okay, if I remember correctly. 
Rebecca had theBologna-style lasagna. I think that bologna refers to the sauce, notthe sandwich meat. Tasted like lasagna. 

Then there was the gnocchi(apparently pronounced nyaw-key). That’s basically chunks of spongy potato. In this case, they were swimming in gorgonzola/brie/fontina/mascarpone/Parmigiano Reggiano cheese sauce.

Probably too decadent, especially as I had trouble getting through half, as some will be happy to hear. It tasted nice, but was very rich and sat like a rock in my stomach. I was most entertained by the texture of the new potato form in between my teeth. 

For dessert we shared a crème brûlée.My first one, too! Almost ironic. After all the time and anticipation of having it, I guess I was expecting more than it really was, though it didn’t taste bad. Glad I didn’t have my own, either. From the sounds of it, I still need some quality time (or meat) with true Italian cuisine. I can’t say this was the best night for my lipoprotein intake, but I most likely had oatmeal for breakfast. And I sure as heck won’t be trying those out again any time soon.

So You’re Given Some Wonton Wrappers…

I found some wonton wrappers in the freezer and was given free reign with them. Between cover letters and new cello calluses, I scavenged the kitchen for whatever would go well together in pockets of crispy noms. What I came up with wasn’t the most creative thing, which just means it’s been done before, and for good reason. I found an apple and made some apple pie filling with cinnamon, sugar and flour, and used that to fill the wrappers. I baked four of these pastry things to see what would happen. They turned out okay enough, but were kinda chewy and kept too much of the wrapper taste. When faced with oil, the pockets fried into what we could probably call mini apple fritters pretty nicely. Topped with powdered sugar, these make sweet snacks or an easy dessert plate.
Finely chopped apple with whatever you want, really
A little cinnamon can go a long way
You should be careful about sealing the wrapper fully,
though it’s likely it will open a little in the oil anyway
Depressing kitchen lighting makes for uncomfortable pictures
To-be-baked pockets
They sure look pretty…
Cheating Baby Apple Fritters!
20 wonton wrappers
1 large apple, Granny Smiths are generally best
4+ tablespoons sugar (or as much as you see necessary fit)
1/2 teaspoon cinnamon (again, a little can do a lot – one good shake should do)
2 tablespoons flour
Water, to seal wrappers
Oil for frying
Powdered sugar for decorating
1. Peel and finely chop the apple, and combine with sugar, cinnamon, flour, and any other spices you want to add
2. Lay out wonton wrappers and top with a heaping teaspoon of apple filling. Wet the edges of the wrapper and seal into an attractive pocket
3. Don’t bother with the oven; put oil on medium heat and wait
4. Place 3-4 pockets in the oil, turn over after wrappers brown
5. Drain oil from fritters with something(s)
6. Sift powdered sugar onto fritters to decorate and serve on fancy plate
Note: Make sure you don’t get sprayed by hot oil when the pockets are upside-down; they’ll be opening up and coming in contact with the juice from the filling so stay light on your feet…
This recipe is the first brought to you by Carmen Kitchens…more to come, one would hope
Powdered sugar makes things look simultaneously appetizing and unhealthy

The Dying Art of PaNcAkEs…and Food in General

     If my theory is correct, then fewer and fewer people are making pancakes from scratch. This theory is based on observations made over the past half of my life. These days, people are straight surprised to discover that anyone makes their own pancakes anymore. Forget that they taste better than Aunt Jemima’s (which were really Chris Rutt and Charles Underwood’s). When Iris made apple cinnamon compote to go with my apple cinnamon pancakes, her dad was thinking the pancakes were made from their Bob’s Red Mill pancake mix, and was more impressed with the compote. Rightly so, until I explained that the pancakes were also apple cinnamon, and no pancake mix was harmed in the making of my pancakes. He took it all back. But I could have eaten all that compote with a spoon.
     It is a real fact that fewer people cook in general than in the good old days. Dare I expand that to know how to cook in the first place? Somewhere between Julia Child’s Boeuf Bourguignon and the manipulative advertising of the Food Network, author Michael Pollan explains the evolution of cooking and the phenomenon of the ever-sprouting laziness of Americans in his New York Times article “Out of the Kitchen, Onto the Couch” (mentioned by TreeHugger here). Can you imagine being responsible for feeding a family, yet spending less than 30 minutes a day preparing all food? That’s how long it takes the average American today, though one must wonder what demographic(s) of Americans were surveyed for this statistic. So basically, people use their supposed allotted food prepping time to instead (of course) watch TV with Rachael and Bobby throwing food in the air, or Anthony Bourdain throwing food into his mouth–because how many food shows actually show how to make a meal anymore?
     The series of events for producing a meal has dwindled over time. Painfully sardonic food researcher Harry Balzer notes, “A hundred years ago, chicken for dinner meant going out and catching, killing, plucking and gutting a chicken. Do you know anybody who still does that? It would be considered crazy!” I mean, that definitely depends on the country you’re in, but we can see his point. You can’t even call it cutting corners; people are simply giving their cooking responsibilities to fast food restaurants, frozen pizza and Lean Cuisine.
     Balzer argues there is nothing to be done about the cooking situation in America, but I’d like to think there are enough people out there who do in fact care about what they’re putting in their bodies and how it gets there. Because if you eat carelessly without paying mind to the nutrients you’re not getting or the toxins you are, then sooner or later if you don’t already have a health condition that leaves you with no choice but to carefully inspect all your chow, you’ll likely get one eventually.
     Moral of this story obviously is: make your own damn pancakes.
Breakfast of champions
New York Times’ Everyday Pancakes
2 cups all-purpose flour
2 teaspoons baking powder
¼ teaspoon salt
1 tablespoon sugar, optional
2 eggs
1½ to 2 cups milk
2 tablespoons melted and cooled butter (optional), plus unmelted butter for cooking, or use neutral oil.
1. Heat a griddle or large skillet over medium-low heat. In a bowl, mix together dry ingredients. Beat eggs into 1½ cups milk, then stir in 2 tablespoons melted cooled butter, if using it. Gently stir this mixture into dry ingredients, mixing only enough to moisten flour; don’t worry about a few lumps. If batter seems thick, add a little more milk.
2. Place a teaspoon or 2 of butter or oil on griddle or skillet. When butter foam subsides or oil shimmers, ladle batter onto griddle or skillet, making pancakes of any size you like. Adjust heat as necessary; usually, first batch will require higher heat than subsequent batches. Flip pancakes after bubbles rise to surface and bottoms brown, after 2 to 4 minutes.
3. Cook until second side is lightly browned. Serve, or hold on an ovenproof plate in a 200-degree oven for up to 15 minutes.
Yield: 4 to 6 servings (begs the question: how much is a serving?).
Blueberry or Banana Pancakes: Use fresh or frozen (not defrosted) blueberries; overripe bananas are great. Just before cooking, stir blueberries into batter. For bananas, slice them and press into surface of cooking pancakes. Cook pancakes a little more slowly than you would other pancakes as they burn more easily.
Whole-Grain Pancakes: Substitute whole wheat flour, cornmeal, rolled oats or a combination for up to 1 cup of flour and proceed with recipe.
Found here

Rollin’ Roulade

     Happy New Year! My Frame-By-Frame baking cookbook struck again with its slightly inconvenient recipe for a roulade, which I guess can mean anything rolled up, likely edible (and not to be confused with the musical technique). Originally a coffee walnut roulade, the sticky outcome of Iris and my efforts was more of a spice-cream cheese roulade. All the better, though! This was definitely a new experience for the two of us, having to beat egg whites…and their yolks, with an electric mixer. After adding all the baking spices in the cupboards, almond & vanilla extract in place of the coffee extract, and the typical dry ingredients, we poured the mixture (not much of a dough) onto a baking sheet and moved it to the oven while we worked on the filling. Lacking necessary/most ingredients for the classic icing swirl, we opted for a cream cheese frosting instead, using only cream cheese, sugar and vanilla extract. The most important part of the process was likely the patience possessed while we waited for the roulade to cool in its ultimate rolled shape right after it came out of the oven. You see, if you let it cool flat and then spread the icing, when you come to roll the whole thing up, it will tragically and literally rip to shreds. There’s little else more frustrating than having your baked good come out looking wonky because you couldn’t wait long enough. Moral of this episode isss: restrain thyself; your occipital lobe will thank you for it.

3.5 eggs and countless minutes later, we have this

Folded, not stirred (bahah wow…)

Looks….uh

The moment of truth
Look at that aesthetically pleasing confection


Coffee and Walnut Roulade
From Frame by Frame Baking by Love Food
Serves 6

Ingredients
Butter or oil, for greasing
3 eggs
1 egg white
1/2 cup superfine sugar, plus extra for sprinkling
1 tsp coffee extract
1/2 cup all-purpose flour, sifted
1/4 cup finely chopped walnuts
Roughly chopped walnuts, to decorate

Filling
3/4 cup heavy cream
1/3 cup confectioner’s sugar, plus extra, sifted for dusting
1 tbsp coffee liqueur

  1. Preheat the oven to 400° F/200°C. Grease a 13×8.5 inch jelly roll pan and line with nonstick parchment paper (any baking sheet will do, though the paper is important).
  2. Place the eggs, egg white, and sugar in a bowl over a pan of very hot water. Whisk with an electric mixer until pale and thick enough to leave a trail (completely stiff is unnecessary).
  3. Whisk in the coffee extract, then fold in the flour and finely chopped walnuts lightly with a metal spoon.
  4.  Spoon into the pan, spreading evenly. Bake in the oven for 12-15 minutes, until golden brown and firm.
  5. Sprinkle a sheet of parchment paper with superfine sugar (that might have helped, but we didn’t do it). Turn out the roulade onto the paper and peel off the lining paper. Trim the edges (oops).
  6. Quickly roll up the sponge from one short side, with the paper inside. Cool completely (try hard).
  7. For the filling, place the cream, sugar, and liqueur in a bowl and whisk until the mixture begins to hold its shape.
  8. Carefully unroll the roulade, remove the paper and spread the cream over. Roll up carefully

Serve the roulade dusted with confectioner’s sugar and topped with roughly chopped walnuts.  <!– @page { margin: 0.79in } P { margin-bottom: 0.08in